In Search of the Stars
For many years, I have been interested in amateur astronomy. At 82 years of age, I have decided to become an active sky searcher again. For about 2 years, I have tried various imaging systems without a great deal of success. Thanks to the advances in technology and the training videos available today, I have obtained a wonderful–and very portable–imaging system and the software to process the images I capture. Now, I am once again an active imager.
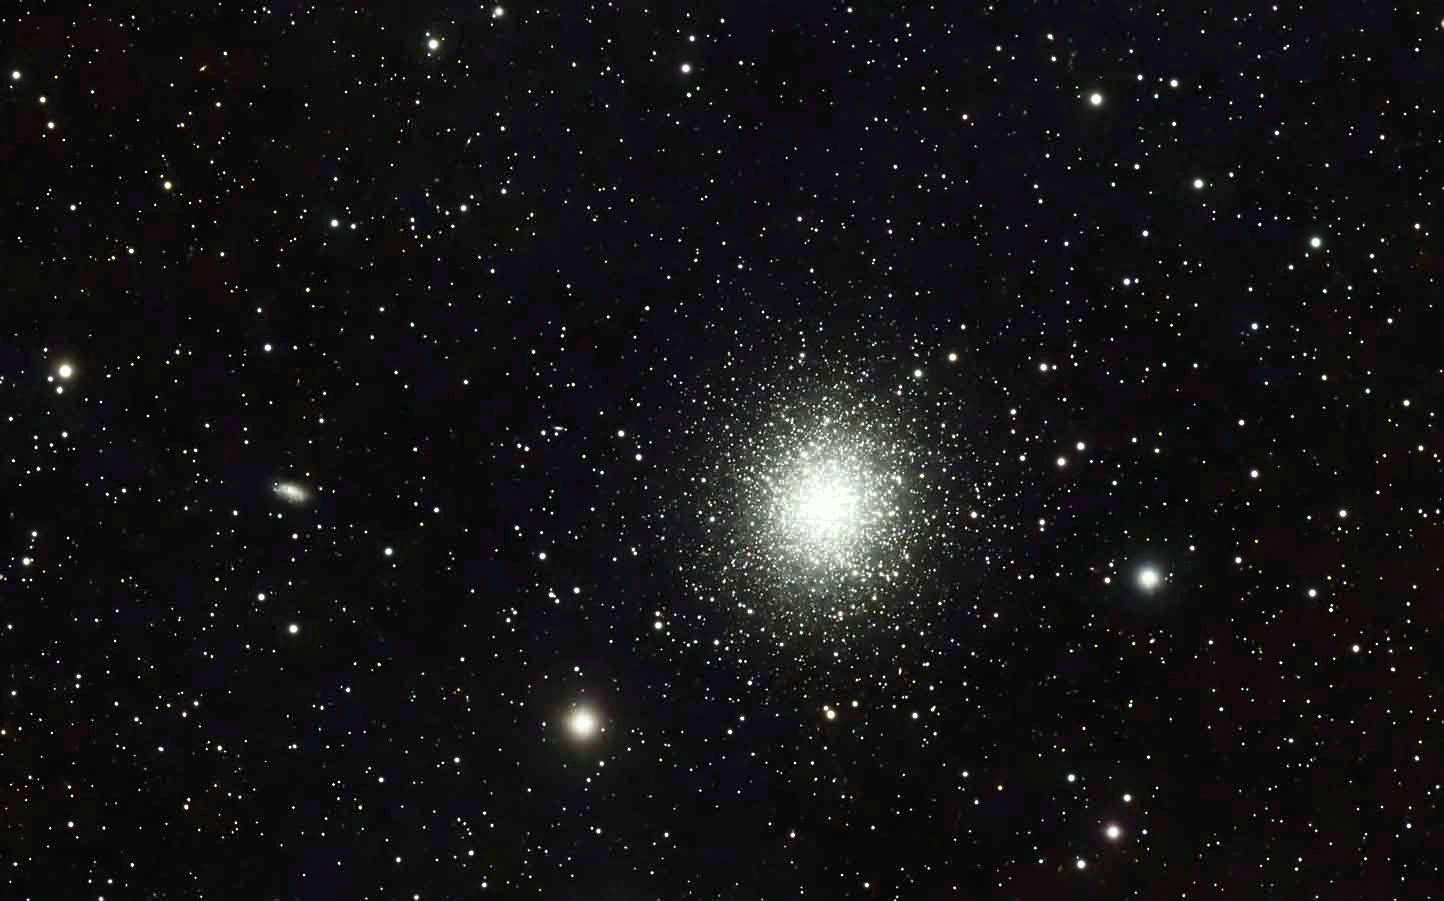
Now, let me show you one of the very first images taken with my new system, M13. The image consists of 12 5-minute light frames plus calibration frames (bias, dark, and flat).
M13
The Hardware
Although I am definitely on a budget, I eventually decided to spend enough money to obtain a quality, go-to imaging system. Be sure to check the references at the end of the article for links to detailed information about the hardware and software I now use.
One of my first purchases was Peter Zelinka's Deep Space Course. For a one-time fee of $150, I have access to over 80 video tutorials. Through his videos, Peter pointed me towards field tested hardware and software—and showed me how to use it. Peter also makes available many free video tutorials online.
Early on, I discovered Agena Astro's web site. Most of my hardware was purchased at Agena. I decided on the following hardware for my system:
- William Optics RedCat 51 III WIFD telescope,
- ZWO AM3 go-to mount,
- ZWO ASI533MC non-cooled, one shot (OSC) camera,
- ZWO TC40 Carbon Fiber Pipe Tripod,
- ZWO ASIAIR Plus 32GB Wi-Fi Smart Camera Controller (with SD Card Slot),
- ZWO ASI120MM-Mini Camera & 30mm f/4 Mini Guide Scope,
- Rouz Astro Cooler for the ZWO ASI533MC Color Camera,
- ZWO EAF Electronic Automatic Focuser - Standard (New 5V Version),
- Optolong L-eNhance Dual Bandpass Light Pollution Reduction Imaging Filter - 2".

At the core of the hardware system is the ASIAIR Plus (that's it mounted under the 'scope's dovetail plate). With this small unit, I can manage the imaging remotely through WIFI. Among its functions are polar alignment, go-to mount control, guide scope calibration and guiding, electronic focusing, and the imaging plan. Also, the ASIAIR powers all of the hardware. It is an absolute joy to watch remotely from my smart phone while the ASIAIR does its magic.
I purchased the ZWO ASI533MC camera on sale. The unit I bought did not have cooling, as does the later ASI533MC PRO. An astronomy friend told me about the external cooler from Rouz Astro and I purchased a kit. The installation on the camera was not difficult and, in operation, the cooling fan is very quiet.
Attaching the ASI533MC to the RedCat was a matter of careful measurement and the choice of the right spacers. I found drawings online that show the RedCat and camera measurements:
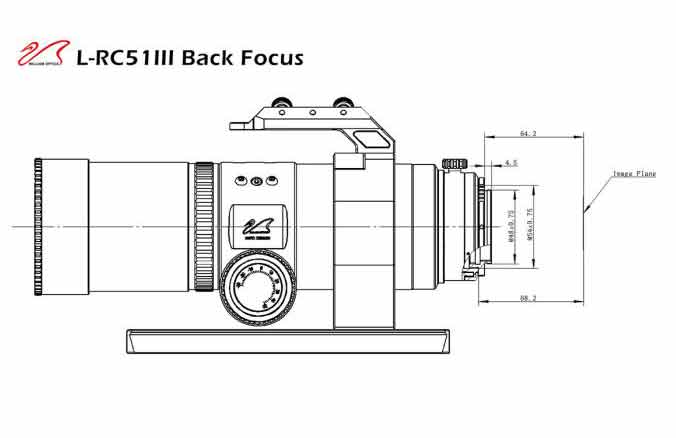
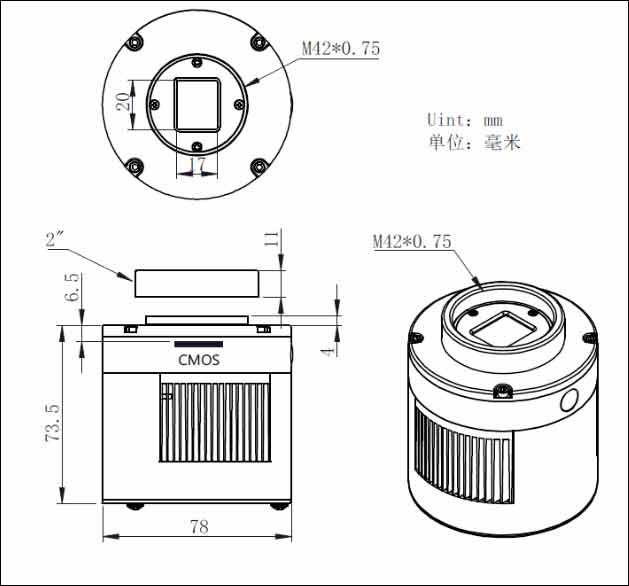
The RedCat has a back focus of 64.2 mm. The camera image plane must be this far away when the focuser is at zero. The camera image plane is 17.5 mm from the front of the 11 mm camera adapter (6.5 + 11). So, ideally, I should have added a total of 46.7 mm of spacing to the camera (64.2 - 17.5). The folks at Stellarvue helped me select the spacers (mm): 5, 30, and 8. So, the total distance to the camera lens (mm) is 17.5 + 8 + 30 + 5 = 60.5. The remaining 3.7 mm was achieved by adjusting the 'scope's focuser out a little bit.
The image below shows the camera, including spacers and cooler, ready to attach to the RedCat:

As the following image shows, the final focus point is as expected. The electronic focuser can move both sides of focus when determining the best focus point. In practice, I can instruct the ASIAIR to initiate focusing before each new image series or at whatever interval I choose.
Initially, I have imaged globular clusters (except for M81 and M82) as they are bright and readily viewable from my back yard. Peter Zelinka suggested I image some of the common nebulae, such as the Lagoon Nebula or North America Nebula. I plan do do this. Peter also suggested I install a filter. I had Agena Astro send me an Optolong L-eNhance Dual Bandpass Light Pollution Reduction Imaging Filter - 2". Eventually, I figured out how to install it in the RedCat—and am now ready for a nebula.

Before I leave the "Hardware" section of this article, I want to say a few words about a problem I had when I first started using my system. The first couple of nights ended in frustration—because I could not focus on the stars. I even thought about returning my camera thinking it was defective. In one of Peter's videos, I saw that he tested his system by imaging during the day. I decided to try the same thing.
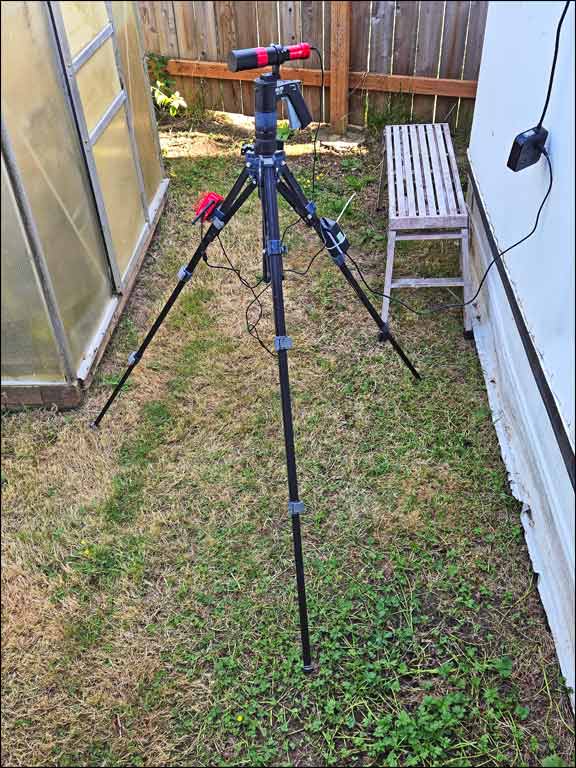
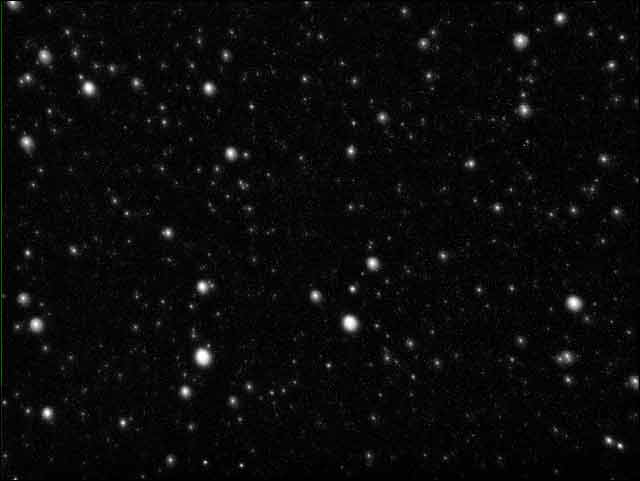
The very next day, I mounted my guidescope on an old tripod along with the ASIAIR and carried it to the backyard. I powered everything up, optioned the guidescope to be the main camera, and began to preview short images. I aimed the 'scope at some distant trees and screwed the lens out. Then, ever so slowly, I screwed the lens back in. Finally, the preview images showed the trees in sharp focus. When the stars came out, and after final small adjustments, I was able to use the guidescope to take some of my first images. The star images were not great, especially with no tracking or guiding, but would do very well for guiding. I live in a bortel 4.5-5 area and I was amazed at how many stars the camera was capturing that I could not otherwise see. I locked the lens in place and called it a successful night. The images below show the tripod setup and my first image through the guidescope.
The following day, I installed the complete system in the backyard. I pointed the 'scope and the ZWO ASI533MC main camera at some trees and ran the focuser out. Then, using very small adjustments towards zero, and while previewing a new image after each adjustment, I finally achieved focus on the trees. That night, as stars began to appear, I saw them in my preview images. With just a tiny bit of additional fine focusing, the stars were sharp and round.
As a last word on the subject of focusing—I do love the ZWO EAF Electronic Automatic Focuser that I have since installed on the RedCat.
Capturing the Images
GET READY....
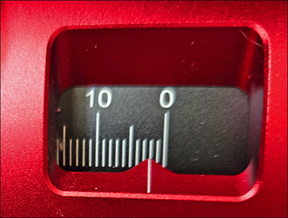
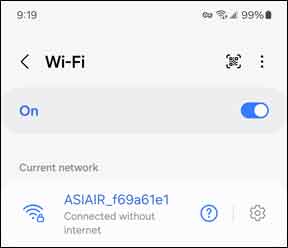
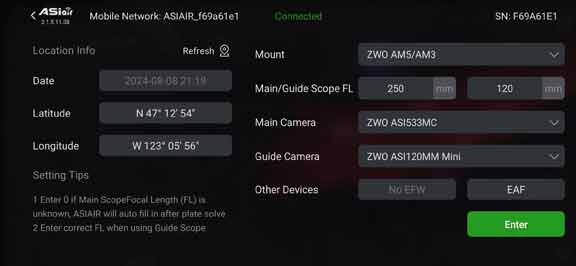
My first step for a night's imaging session is to detatch my telescope system from the mount and put it on the workbench. Without the telescope, the tripod and mount are lighter and easier to safely carry outdoors to the observing area (same area as shown in the tripod image above). I make sure the mount is level and pointing roughly north. A Wixey Digital Angle Guage placed on the mount verifies that I have adjusted the mount's Declination (DEC) correctly. I then carry my telesope to the mount and attach it. Once the dovetail knobs are tight and the 'scope is securely attached to the mount, I connect the guidescope and ASIAIR cables (USB and power) to the mount. The other telescope cables are already attached to the ASIAIR. As a final connection, I attach external power to the ASIAIR. With the ASIAIR mounted under the front end of the RedCat's dovetail, I have had no trouble with cables snaging as the mount moves. At this point, I can power up the ASIAIR, powering all system components. Next, I change my mobile phone's WIFI connection to the ASIAIR. Once the connection is established, and I have verified the telescope system's components and settings, I am ready to polar align the 'scope.
GET SET....
As soon as I start seeing stars in my preview images, I can start the polar alignment. I am really amazed at how easy this is. When I tell the ASIAIR to start the alignment, it starts the process by automatically taking and plate solving images and determining just how much and in what direction I have to adjust the RA and DEC knobs to achieve alignment. After each adjustment, I have the program recheck the alignment.
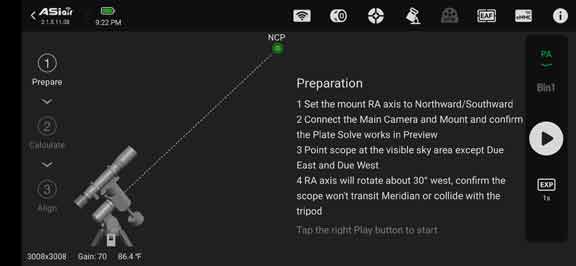
When I have achieved alignment, a smiley face appears on the phone's display. At the conclusion of the alignment, I specify that the mount GoTo the object I plan to image. The mount then slews to the object, centers it in the camera's field of view, and begins tracking.
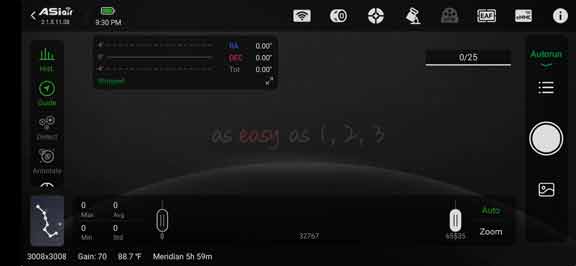
My next step is to use the ASIAIR to set up my guidescope. The guidescope calibration can take a bit of time to complete. When the calibration is complete, the guider will then start guiding and, with the AM3 mount, the guiding is very good. The graph at the top of the screen below will show guiding errors after guiding has started. When I am ready to start imaging, I hit the white start button. The EAF will first go through its focusing routine after which the imaging starts. The ASIAIR keeps a count of the images taken and those remaining.
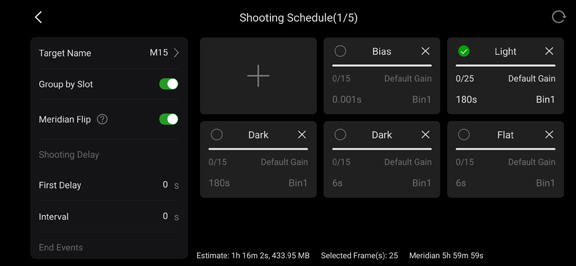
I use the "Autorun" feature to manage the imaging session. In the plan, I can configure the details for each frame type. A checkmark in a green circle in the frame type indicates that shooting that type can be started. For this plan, the light and light dark frames will be 180 seconds each and the flat and flat darks will be 6 seconds each. When I initially set up the plan, I can also instruct the ASIAIR to focus the telescope using the EAF focuser before the first image is taken. The "Shooting Schedule" below will, when completed, capture lights, light darks, flats, flat darks, and bias images.
GO....
I activate and run the light captures first. When they are done, I generally activate and run a set of flats. I use an external light source for the flats. When I have finished taking the flats, I put the caps on the main and guide 'scopes and instruct the ASIAIR to take the mount to the home position. When the 'scope is at the home position, I cover it for the night and begin the bias and dark frame generation. I instruct the ASIAIR to power down after this has been done. I can go to bed knowing that the rest of the calibration frames will be waiting for me in the morning. In the morning, I power up the ASIAIR long enough to copy the image files to a thumbdrive for transfer to my PC. I can delete the files saved by the ASIAIR when I am sure they will no longer be needed.
The Software
After watching many of Peter Zelinka's videos, I decided to purchse a licensed copy of PixInsight for processing my images. I also purchased from RC Astro three recommended "Processes" that can significantly improve the appearance of final images: BlurXTerminator, NoiseXTerminator, and StarXterminator. These extra processes work flawlessly with PixInsight. PixInsight also automatically takes care of updates. Although the total cost of this software might seem high, you can obtain free licenses to try out everything.
As shown in the "Resources" section of this article, there are numerous videos and documents to assist in learning about and using PixInsight. I highly recommend starting with Peter Zelinka's free video series, PixInsight for Dummies (Like Me). These videos introduce PixInsight from installation to more advanced processing. Although my experience with Photoshop did not hurt while learning PixInsight, the PixInsight specific videos and documents definitely helped me while learning the new software (and I still have a lot to learn).
PixInsight offers a couple of ways to process images. I decided to automate the processing using FastBatchPreprocessing (FBPP). Alternatively, a manual calibration of the images is possible using many individual processes. I highly recommend reading Rogelio Bernal Andreo's Mastering PixInsight, CHAPTER IV, and/or Bernd Landmann's Preprocessing of Raw Image Data with PixInsight for a detailed discussion of image preprocessing if you want to manually process your images (links are in "Resources"). It goes without saying that watching Peter Zelinka's videos will make the processing more understandable.
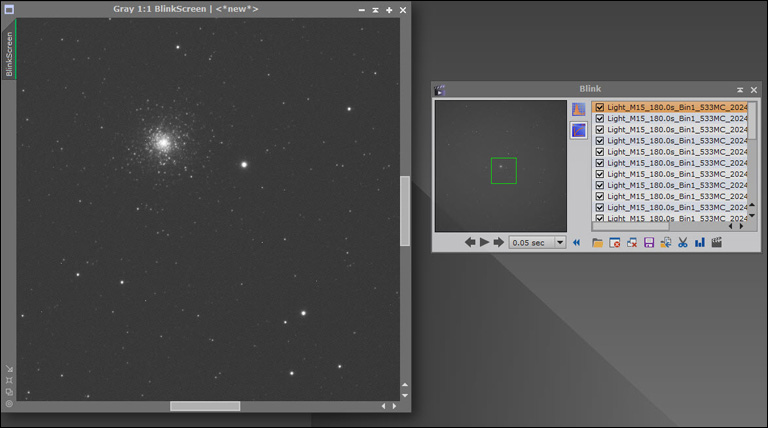
No matter how the images will be processed, they should be inspected to eliminate bad images. PixInsight has a great process for this called Blink. After selecting the files to inspect, Blink opens a display window containing the first image. Other images can be sequentially cycled through the display window or selected from the files list. The image in the preview window can be enlarged to show detail.
FBPP Processing of M15
I created a single directory (m15) on a fast external hard drive for all of the ASIAIR raw images (mine are .fit files). I then transfered the images from a thumbdrive to the directory folder. Next, I previewed the images with Blink to identify and eliminate any bad images. I started FBPP and loaded the files by clicking on the +Directory button at the bottom left of the screen and specifying the image folder. PixInsight is smart enough to load the files where required.

Highlighting the light frames enables important options for the calibration process. Among these options is the Color Filter Array (CFA) option. CFA settings are important for later color processing. I elected to use the default settings. I specified the output directory for the calibrated files (m15). PixInsight will save the files in the .xisf format.
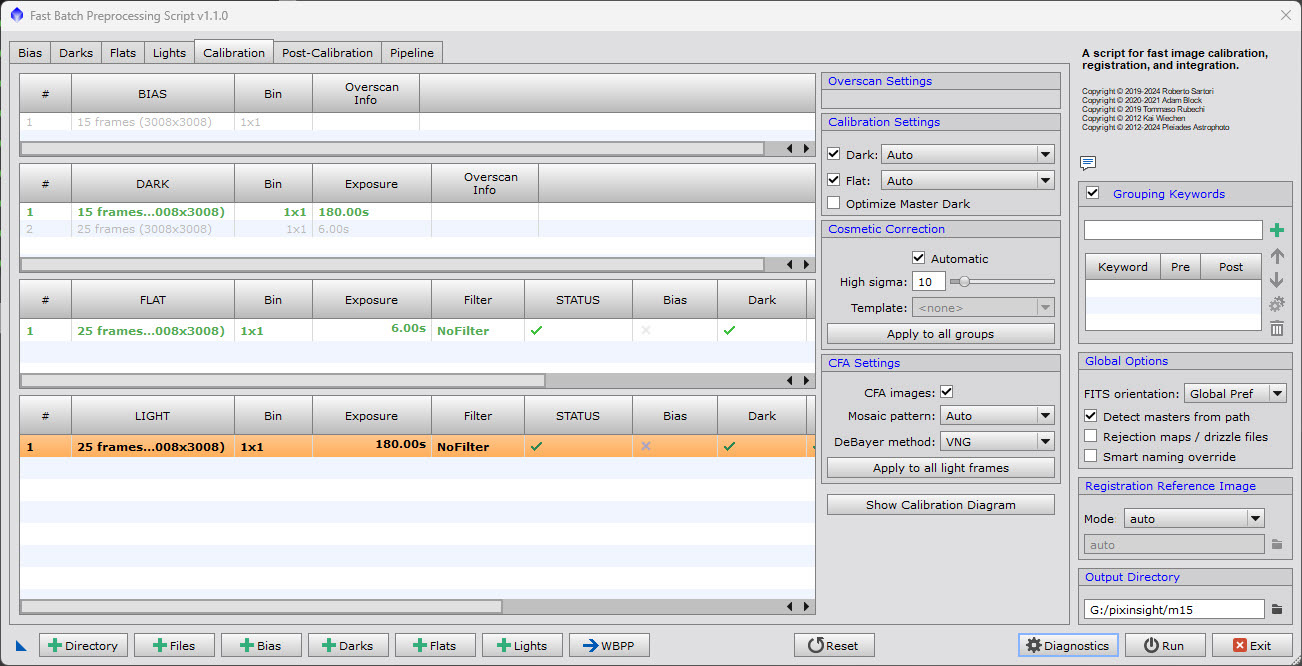
By Clicking on the Run button I started the process. Before actually starting the calibration, FBPP ran a set of diagnostic checks—and I was in the green:
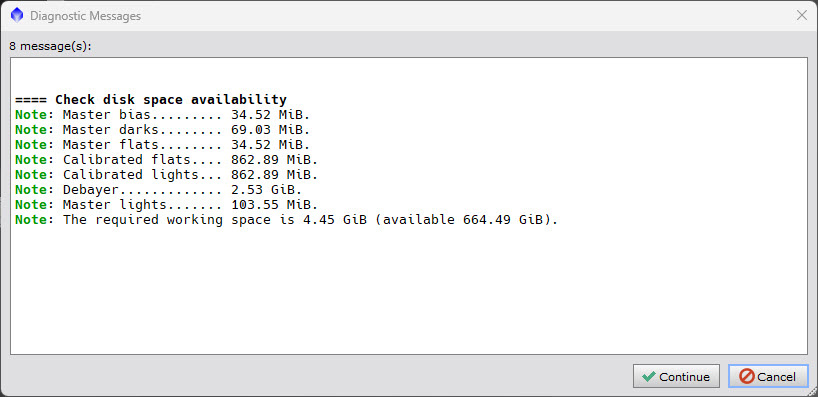
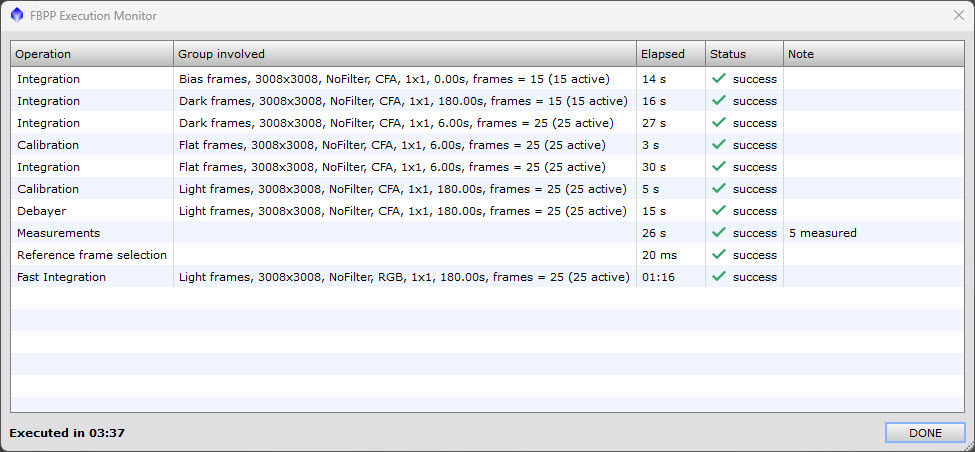
Hitting "Continue" began the calibration. As the calibration began, the FBPP Execution Monitor began displaying the progress step by step. The entire calibration took less than 4 minutes. The calibrated files were automatically saved to the m15 directory in the "master" folder.
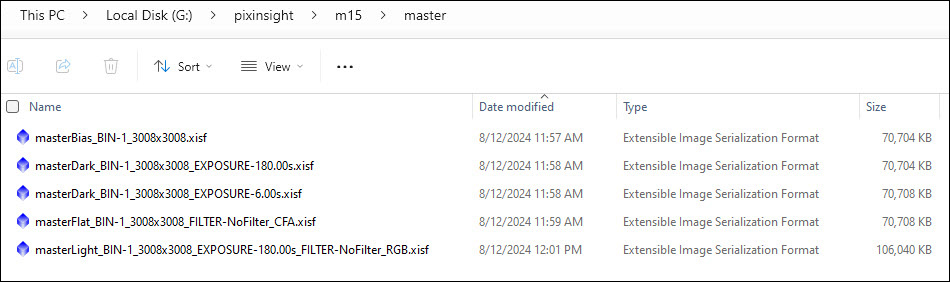
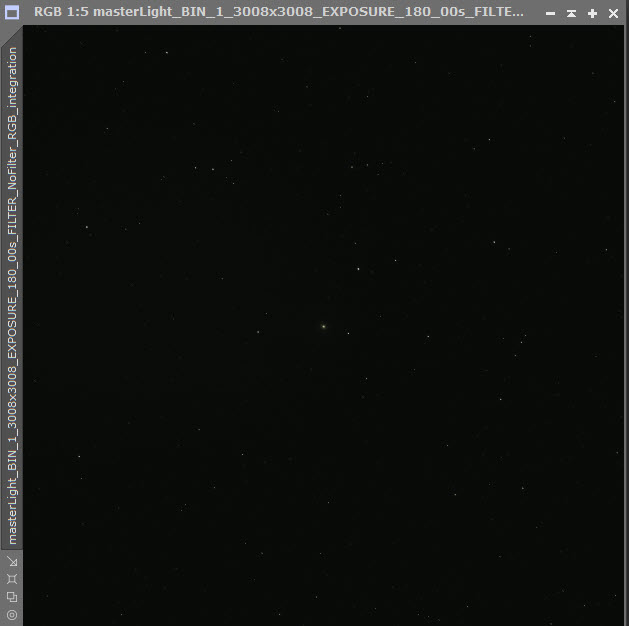
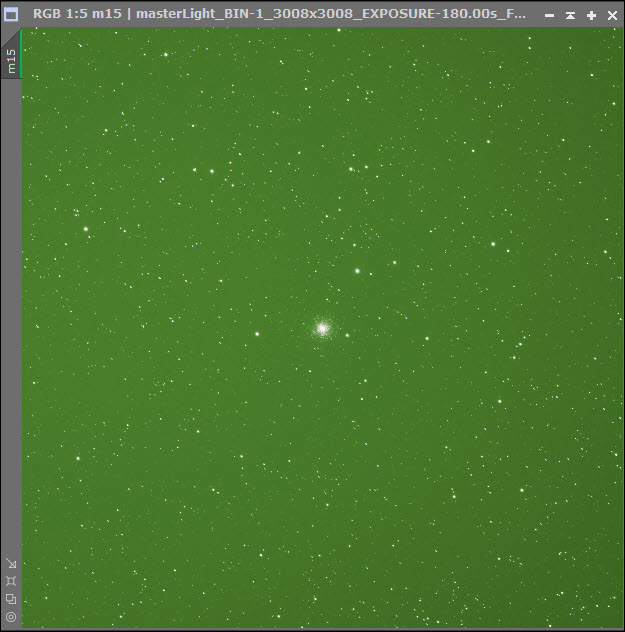
You might well be dissapointed when first viewing the master light file. However, after "stretching" the image (CTL-A), it showed a bit more promise. I renamed the image m15.
I used PixInsight's processes in the following order to process both the M15 and M82 images. When I got to the CurvesTransformation and ColorSaturation processes, I just had fun doing my best to bring out some color. At the end of the PixInsight processing, I brought the images into my ancient version of Photoshop for final tweaks, as necessary—and it really wasn't necessary.
- Blink,
- FBPP,
- DynamicCrop,
- BackgroundNeutralization,
- HistogramTransformation,
- CurvesTransformation,
- ColorSaturation,
- NoiseXTerminator.
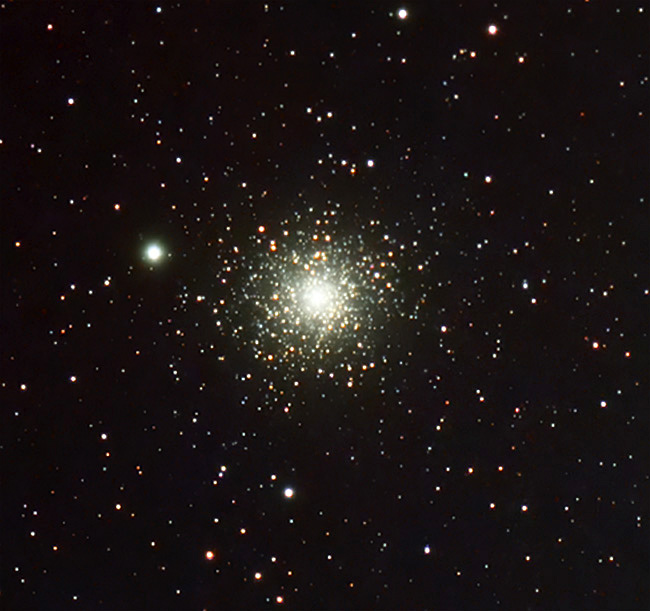
To summarize the processing, light frames were calibrated with FBPP, the green gradient was removed and I was then able to bring out some color. My goal for the processing was not to produce anything scientific, but just pretty pictures.
M15: 25 180-second light frames
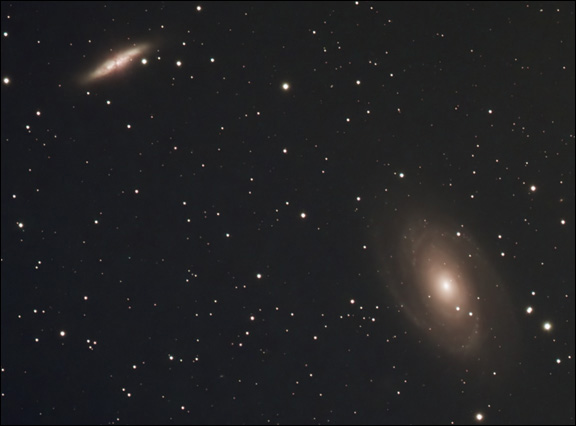
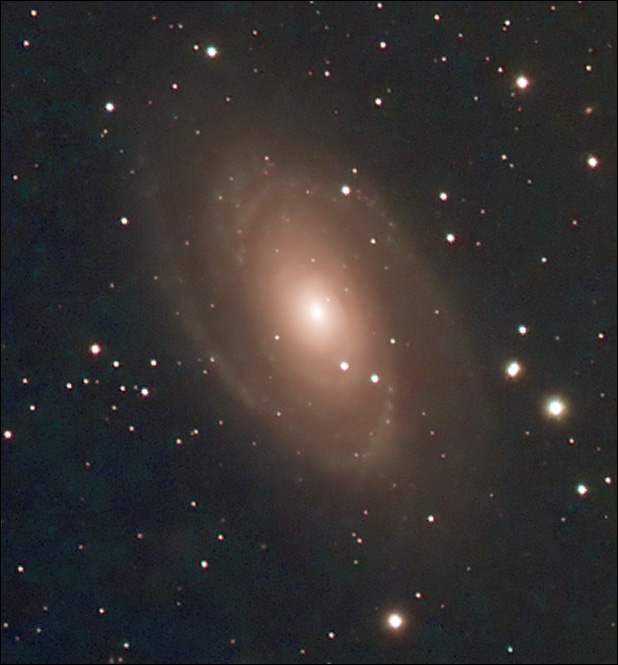
M81 and M82 (M81 is the big one): 17 300-second light frames
About the Images
The images used for this article were captured in two ways. For images on my PC, I used Snagit. For images on my mobile phone, a Samsung Galaxy S24, I pushed down–simutaneously–the side and volume down buttons. This did a .jpg screen capture which I could then email to my PC. Once the images were on my PC, I used Photoshop to process them for the article (any photo editor could have been used for this).
Resources
- PixInsight For Dummies (Like Me) and Other Video Tutorials by Peter Zelinka ,
- Peter Zelinka's Deep Space Course on howtube,
- PixInsight Image Processing Software,
- Rogelio Bernal Andreo's Mastering PixInsight and Reference Guide,
- Bernd Landmann's Preprocessing of Raw Image Data with PixInsight,
- RC Astro: BlurXTerminator, NoiseXTerminator, StarXTerminator,
- Agena Astro: Hardware for Astro Imaging,
- Agena Buyer's Guide to ZWO Astronomy Cameras by Brian Ventrudo and Manish Panjwani,
- High Point Scientific: Telescopes, Cameras, and Other Hardware for Astro Imaging,
- High Point Scientific AstronomyHub: ZWO ASIAIR Ultimate Guide,
- Rouz Astro: Cooler for the ZWO 533MC Color Camera,
- William Optics: Telescopes and Accessories Including RedCat 51 WIFD Manual,
- Manuals for ZWO Products (ASIAIR, AM3, EAF, Cameras),
- Revealing The Nebulae With Pixinsight How I process nebulae with PixInsight.
- The CCD Edge: Introduction to CCD imaging. PDF version,
- CCD Image Processing: M16 Processing CCD images of Messier M16 (NGC 6611), the Eagle Nebula,
- Stellarvue: Fine Telescopes and Accessories,
- Stellarium: A Planetarium for Mobile Phones,
- Cartes du Ciel: My Favorite Computer Skychart ,
- Snagit: PC Screen Capture,
- CoffeeCup: My HTML editor of choice and used for this article.
The Handbook of Astronomical Image Processing was written many years ago by Richard Berry and James Burnell. This book is my standby reference to the field of astronomical imaging. Unfortunately, it is no longer in print. The latest release of the book was 2.0. If you do not have this book but can find a used copy—grab it!