TCMAA and LNRCFC Float-Fly Calendar for 2015
A Calendar for 2015
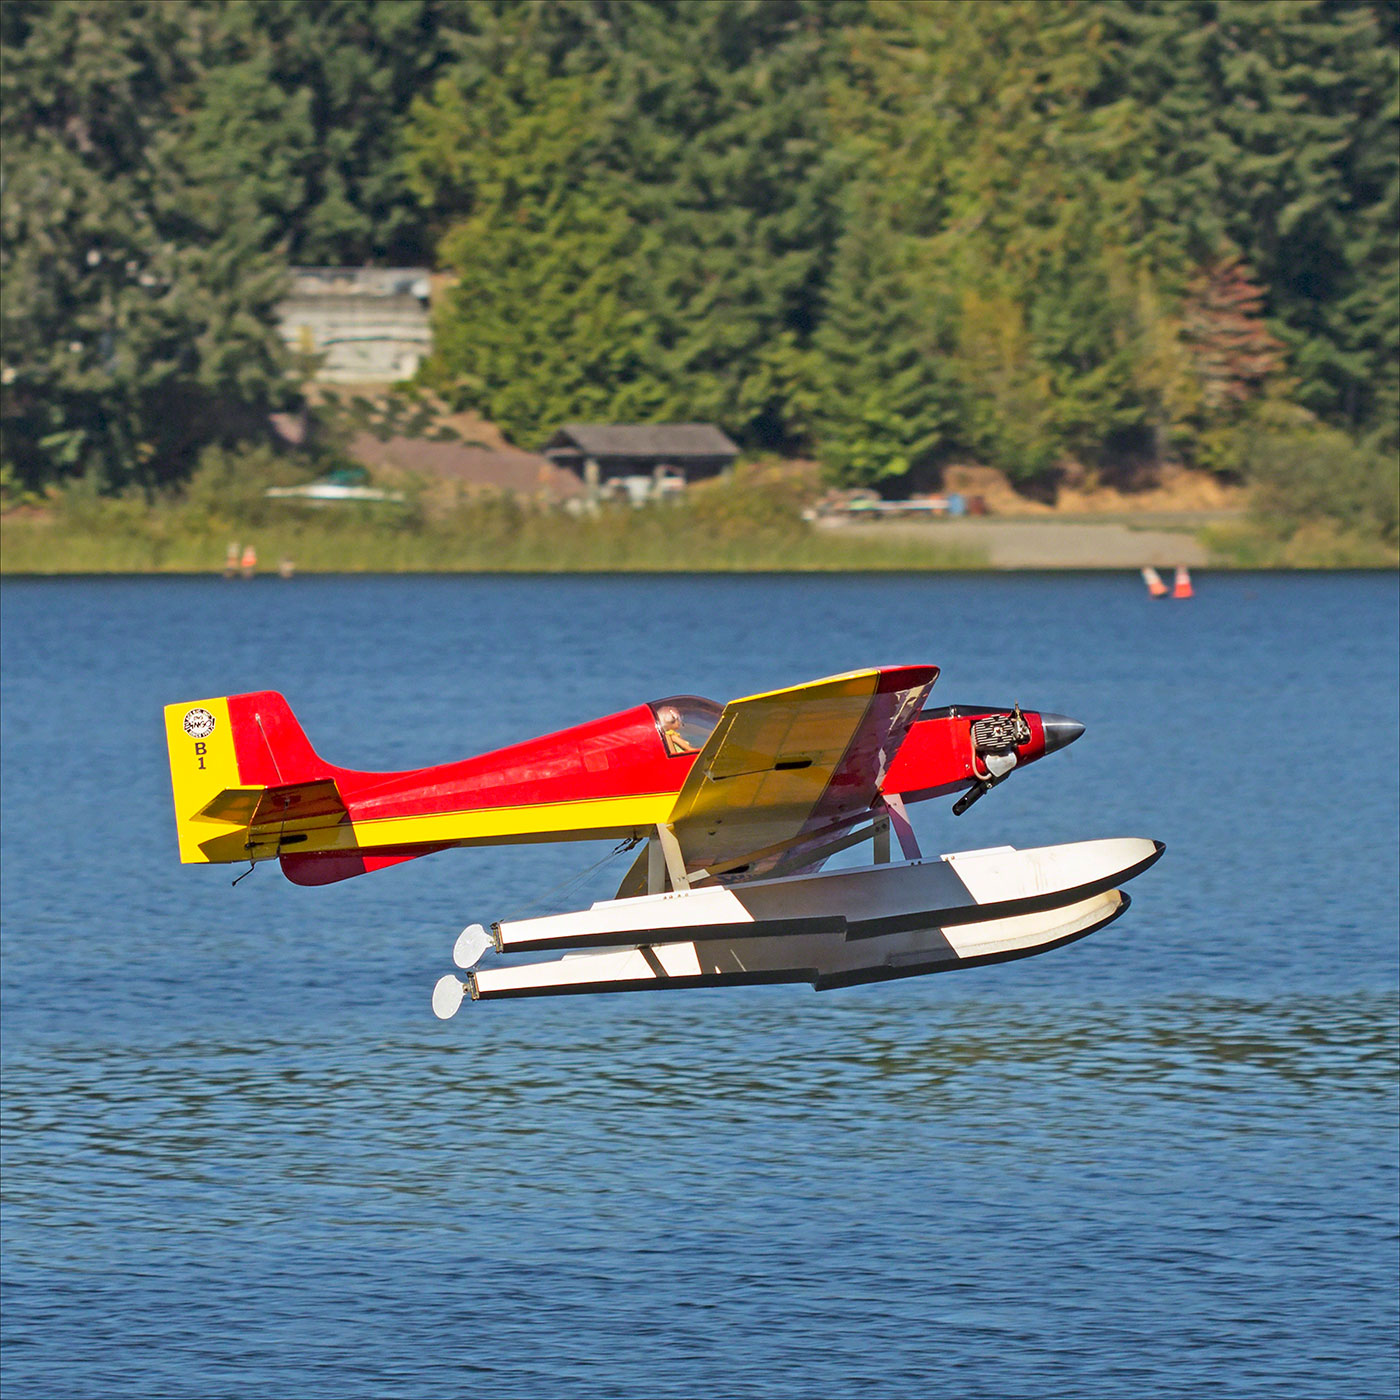
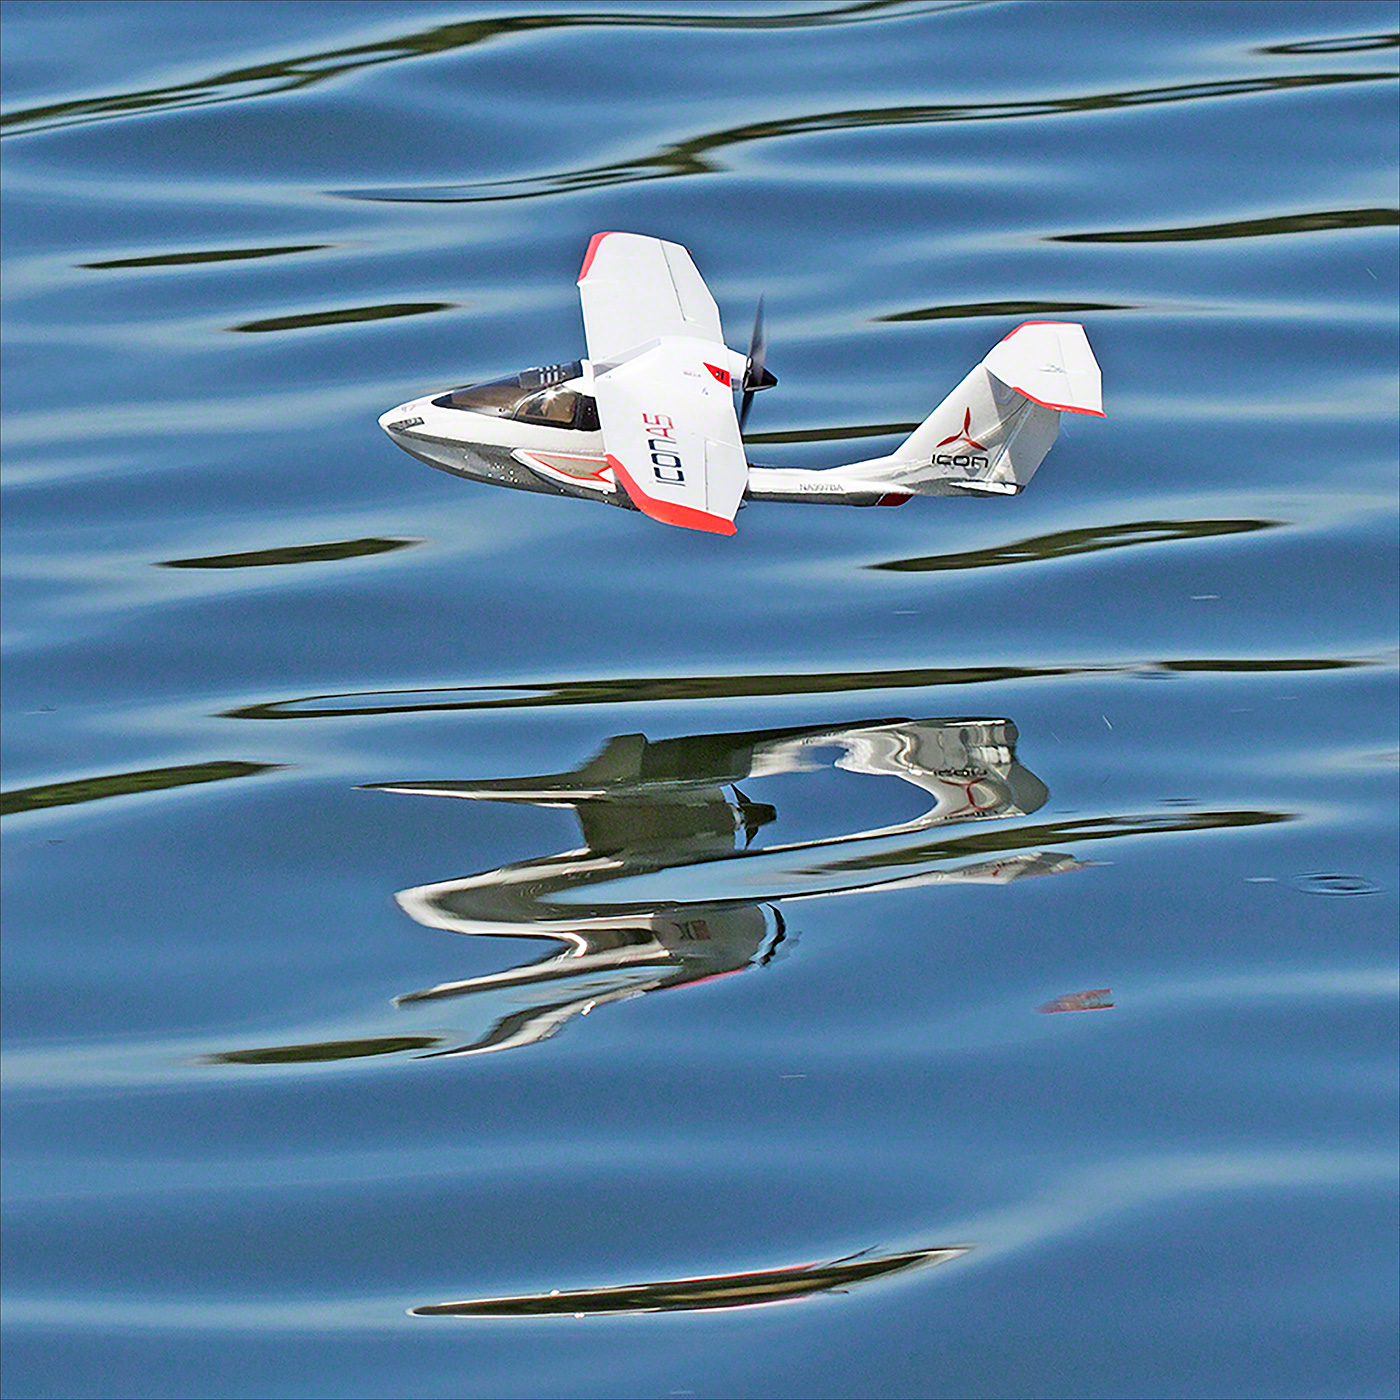
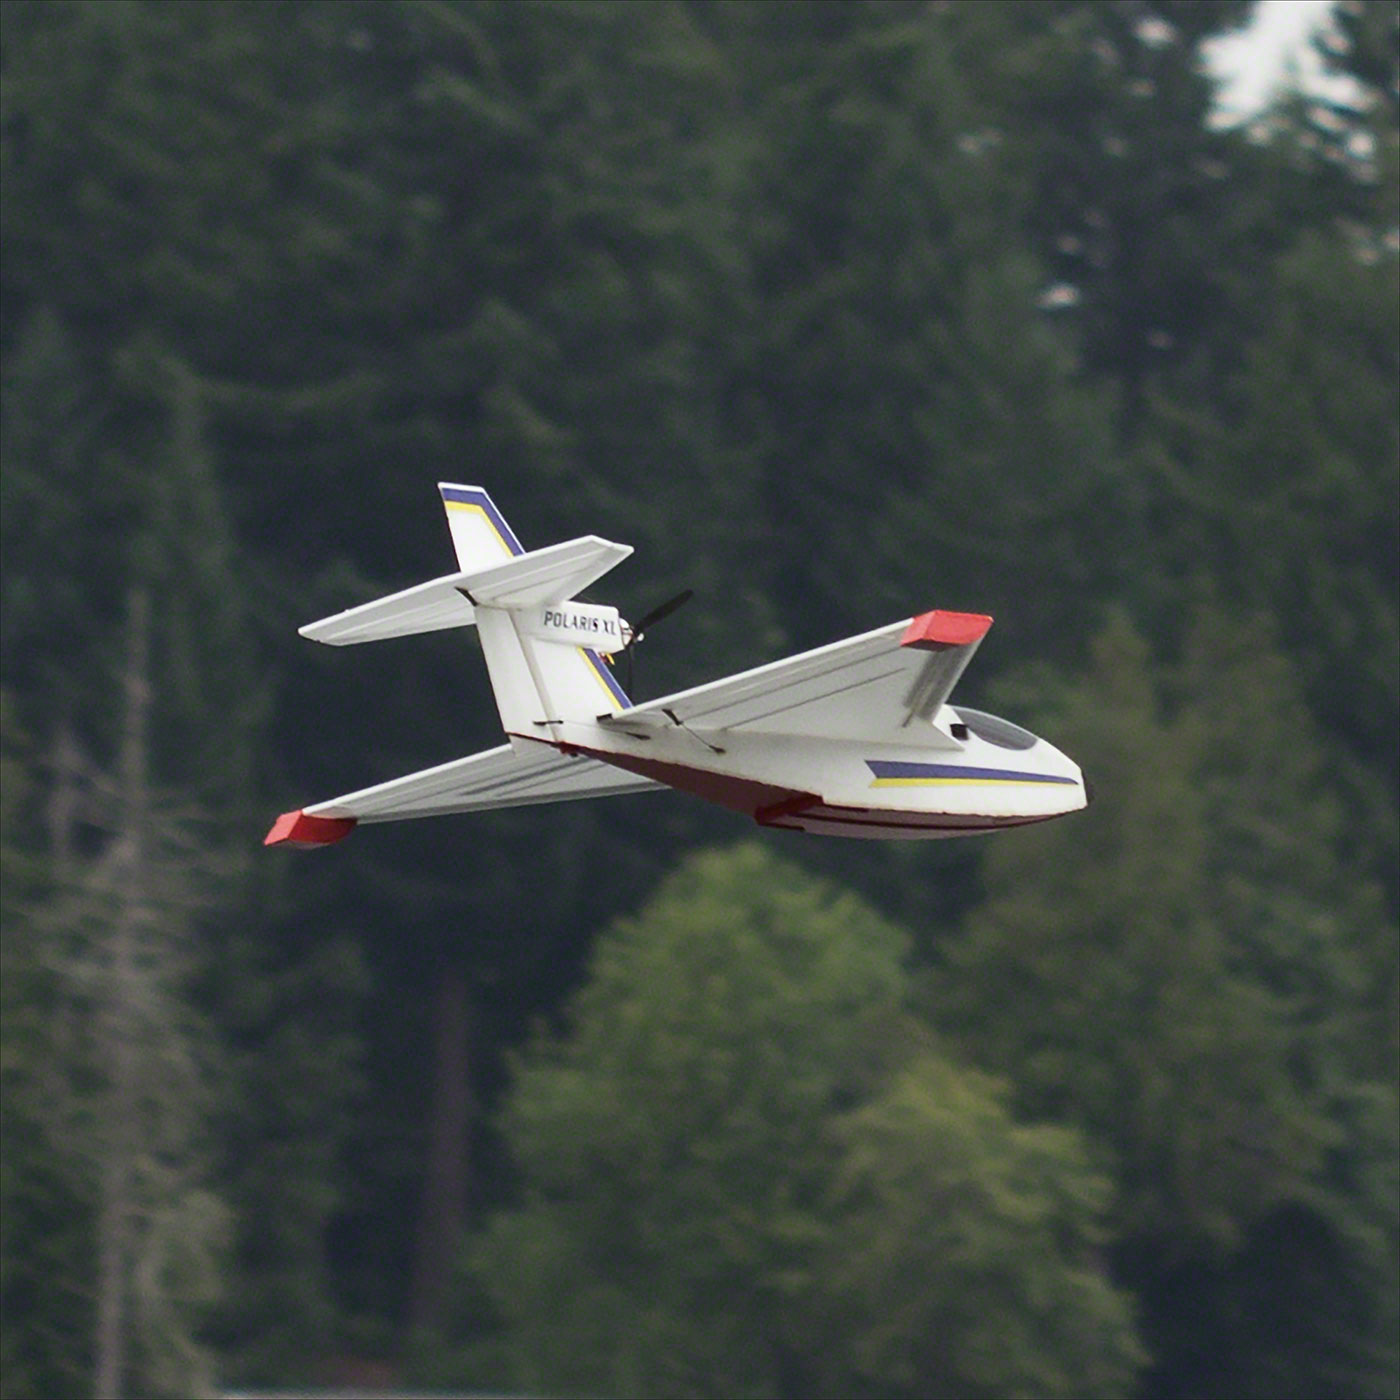
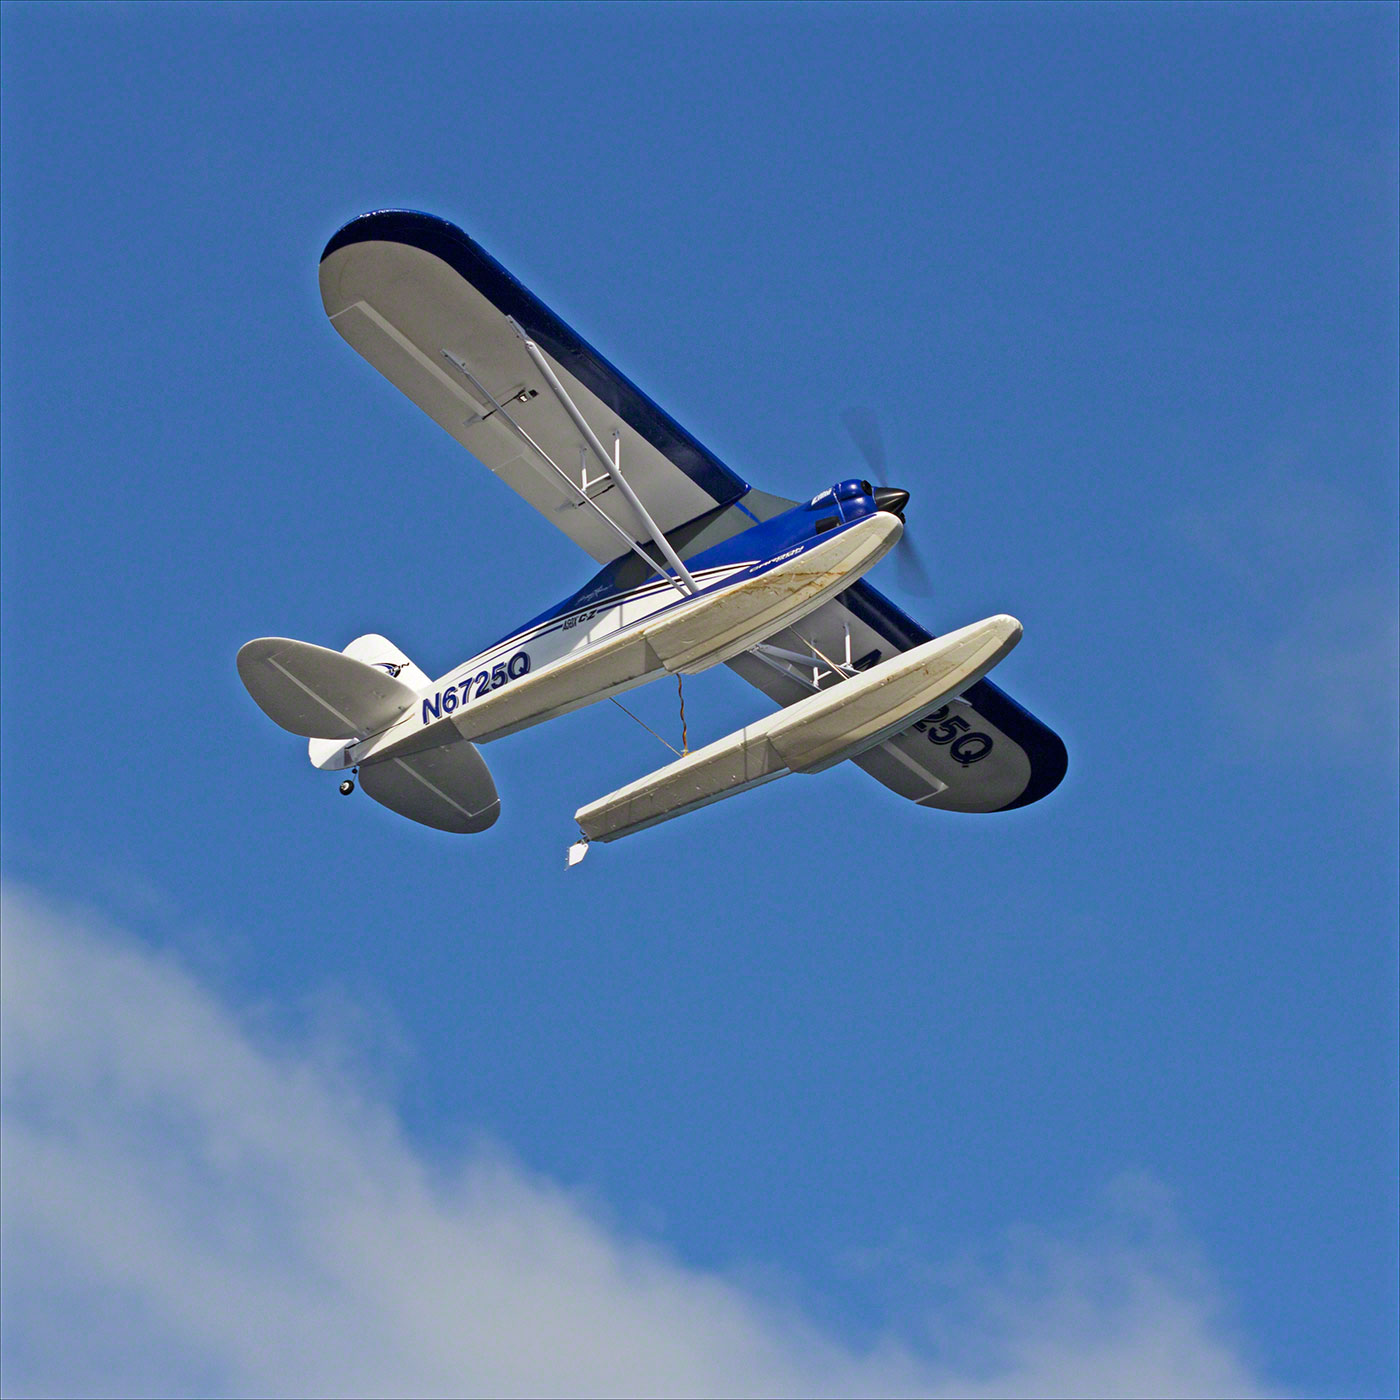
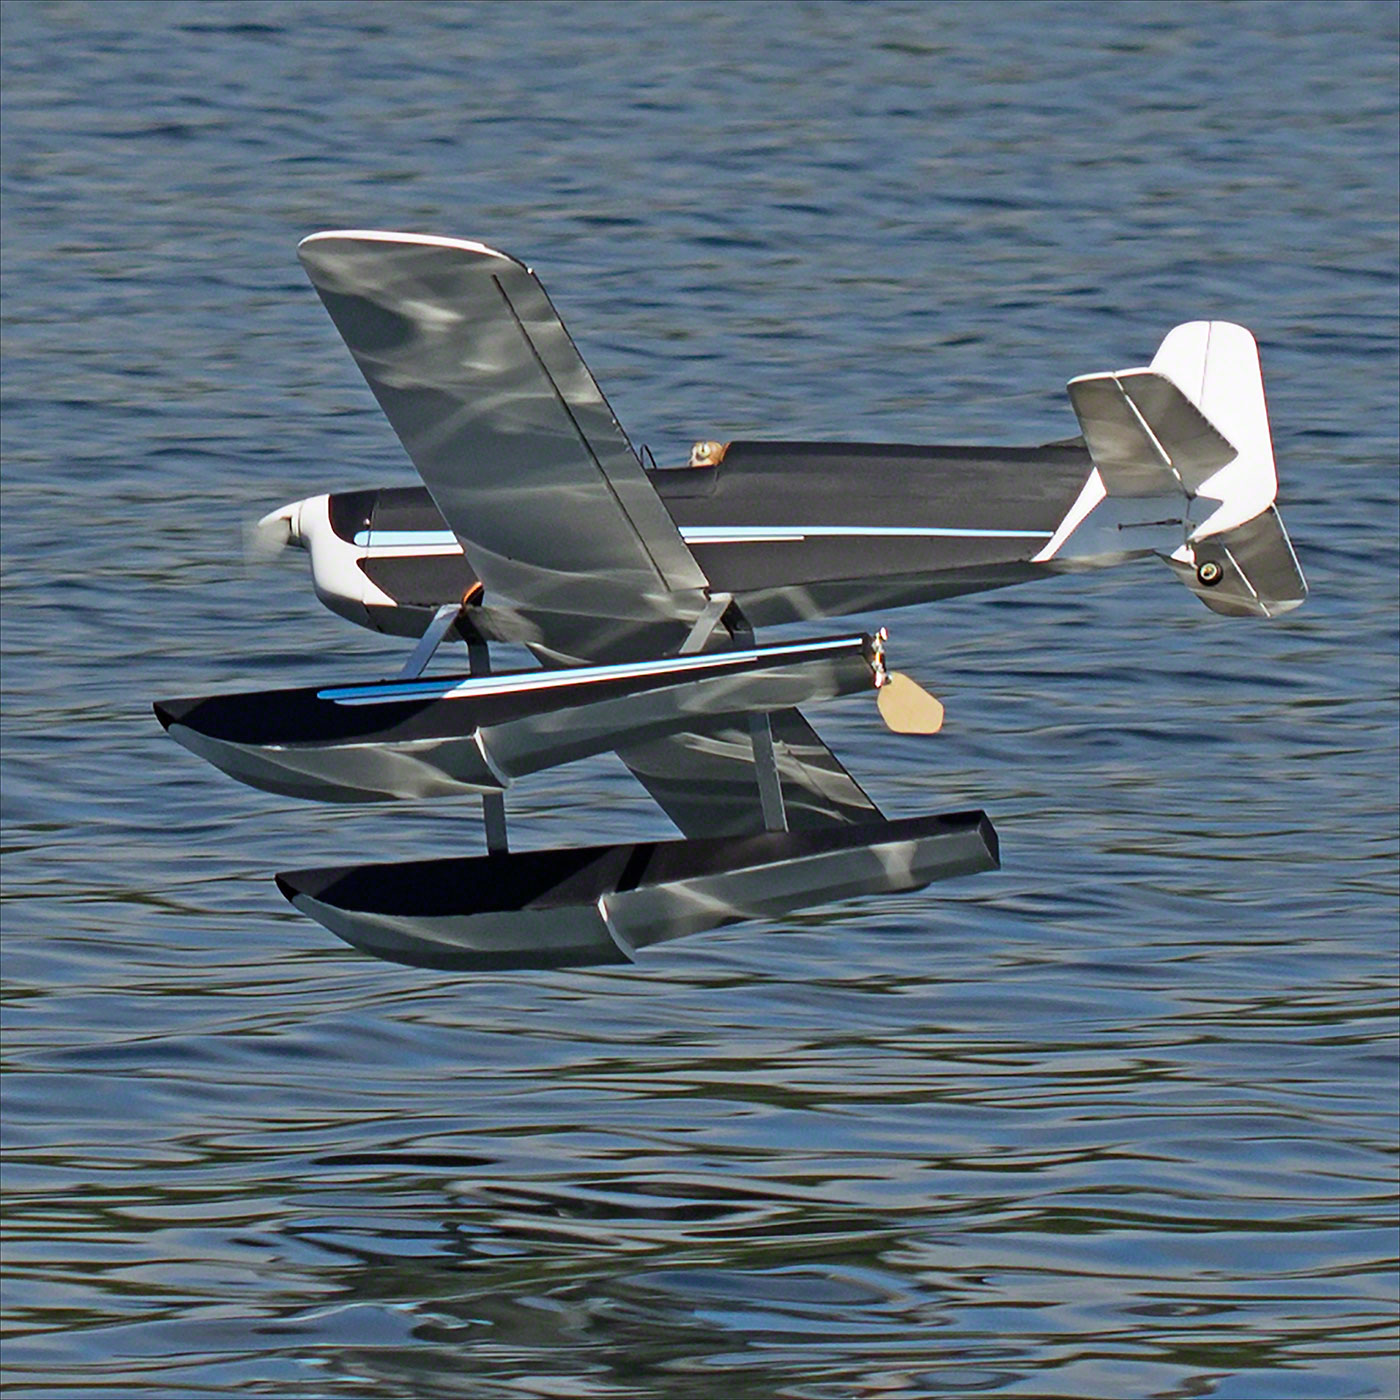
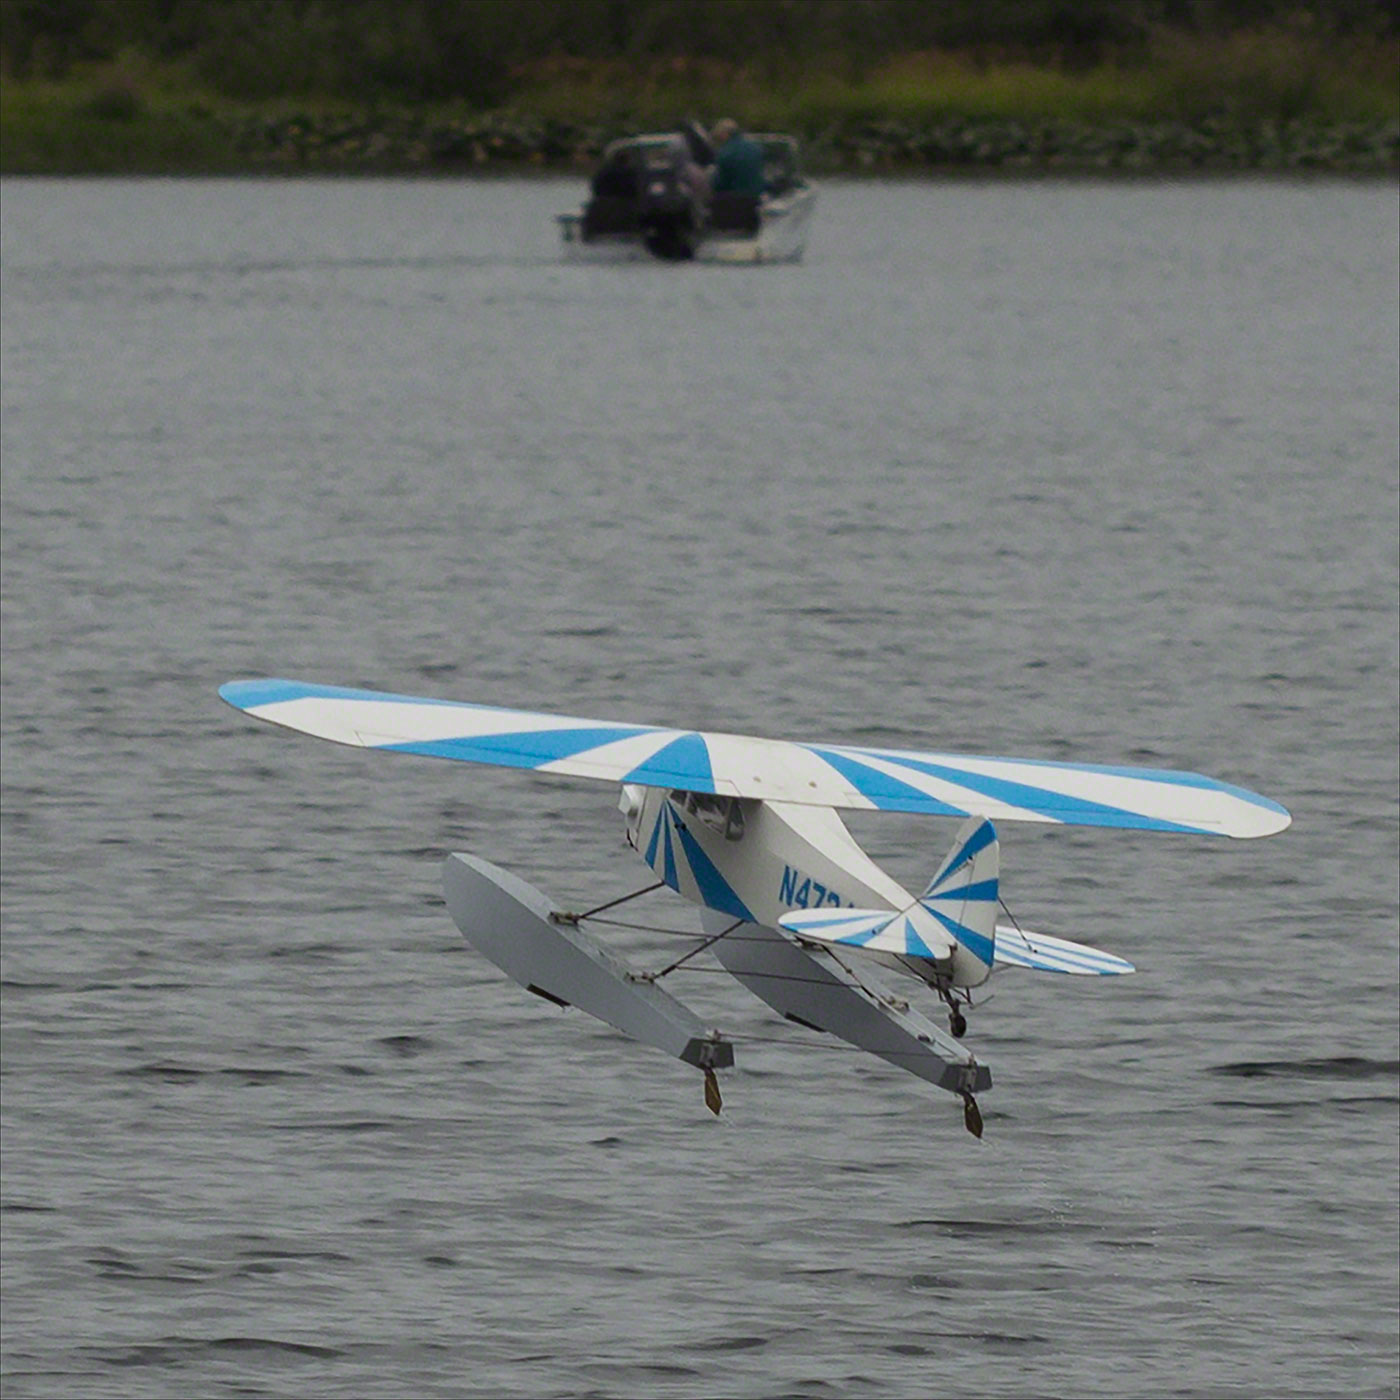
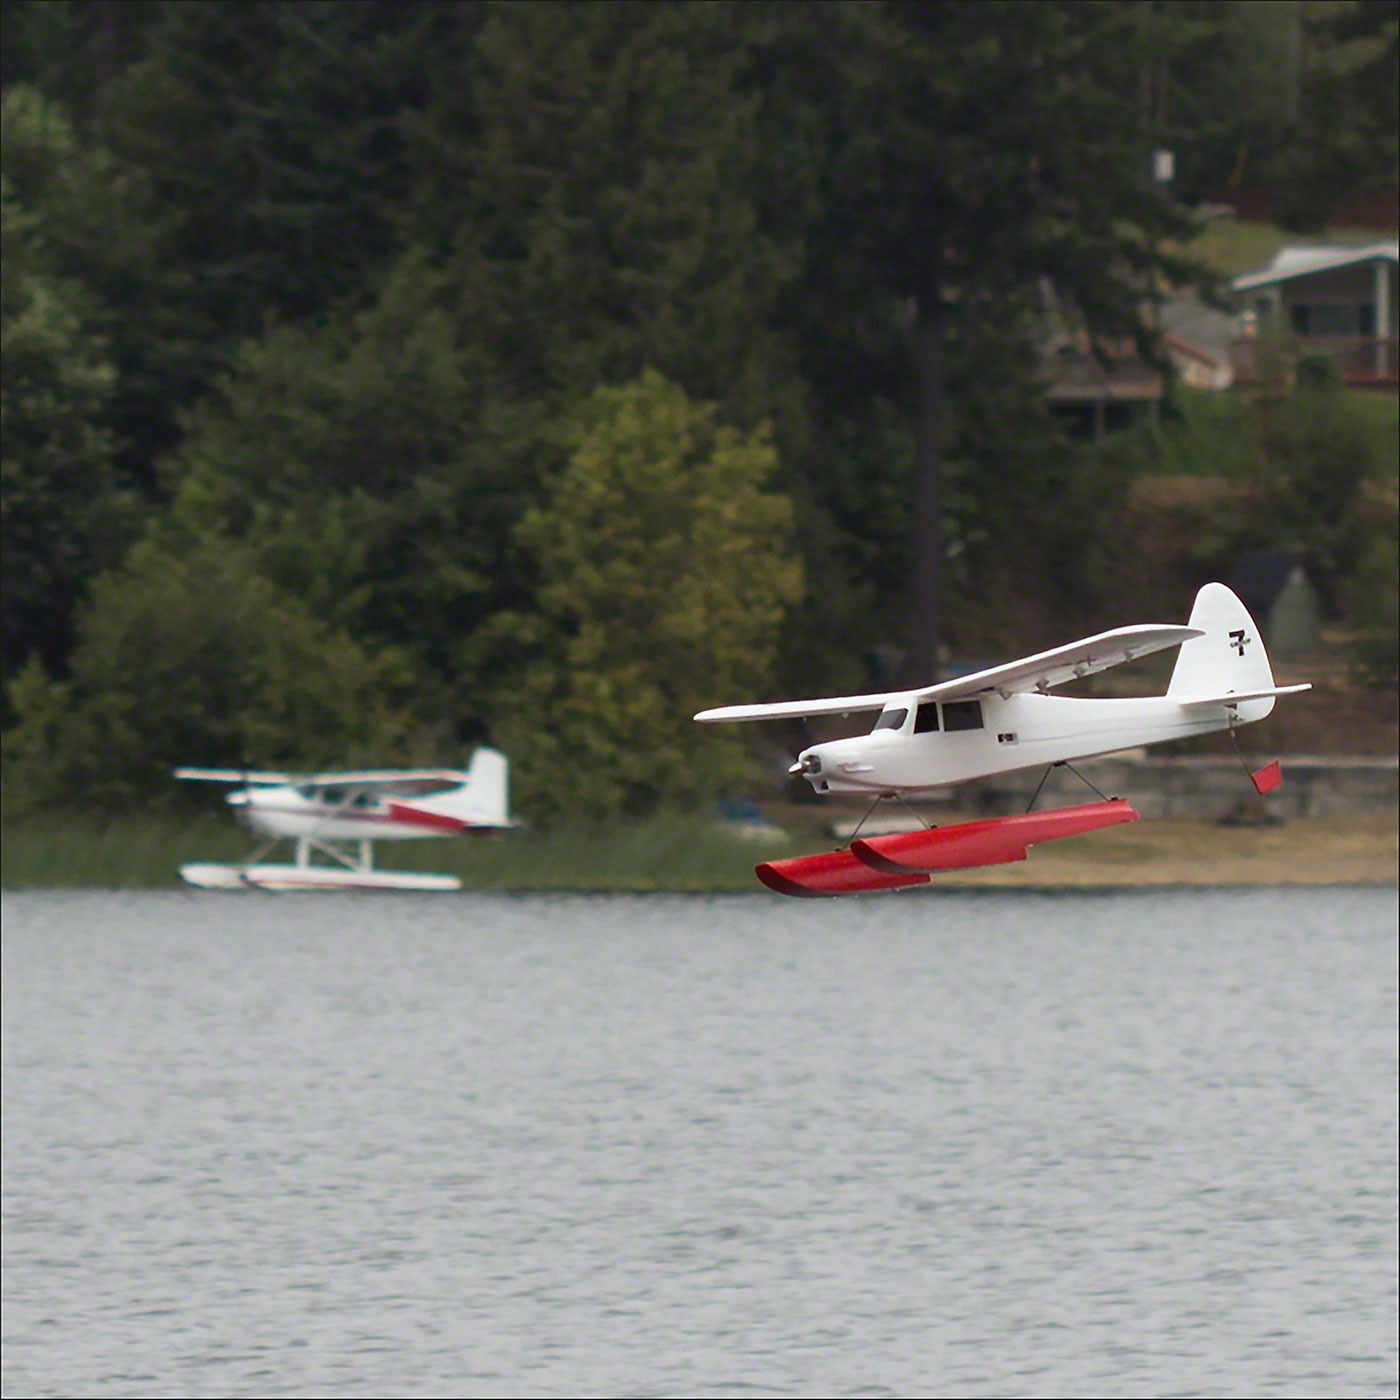
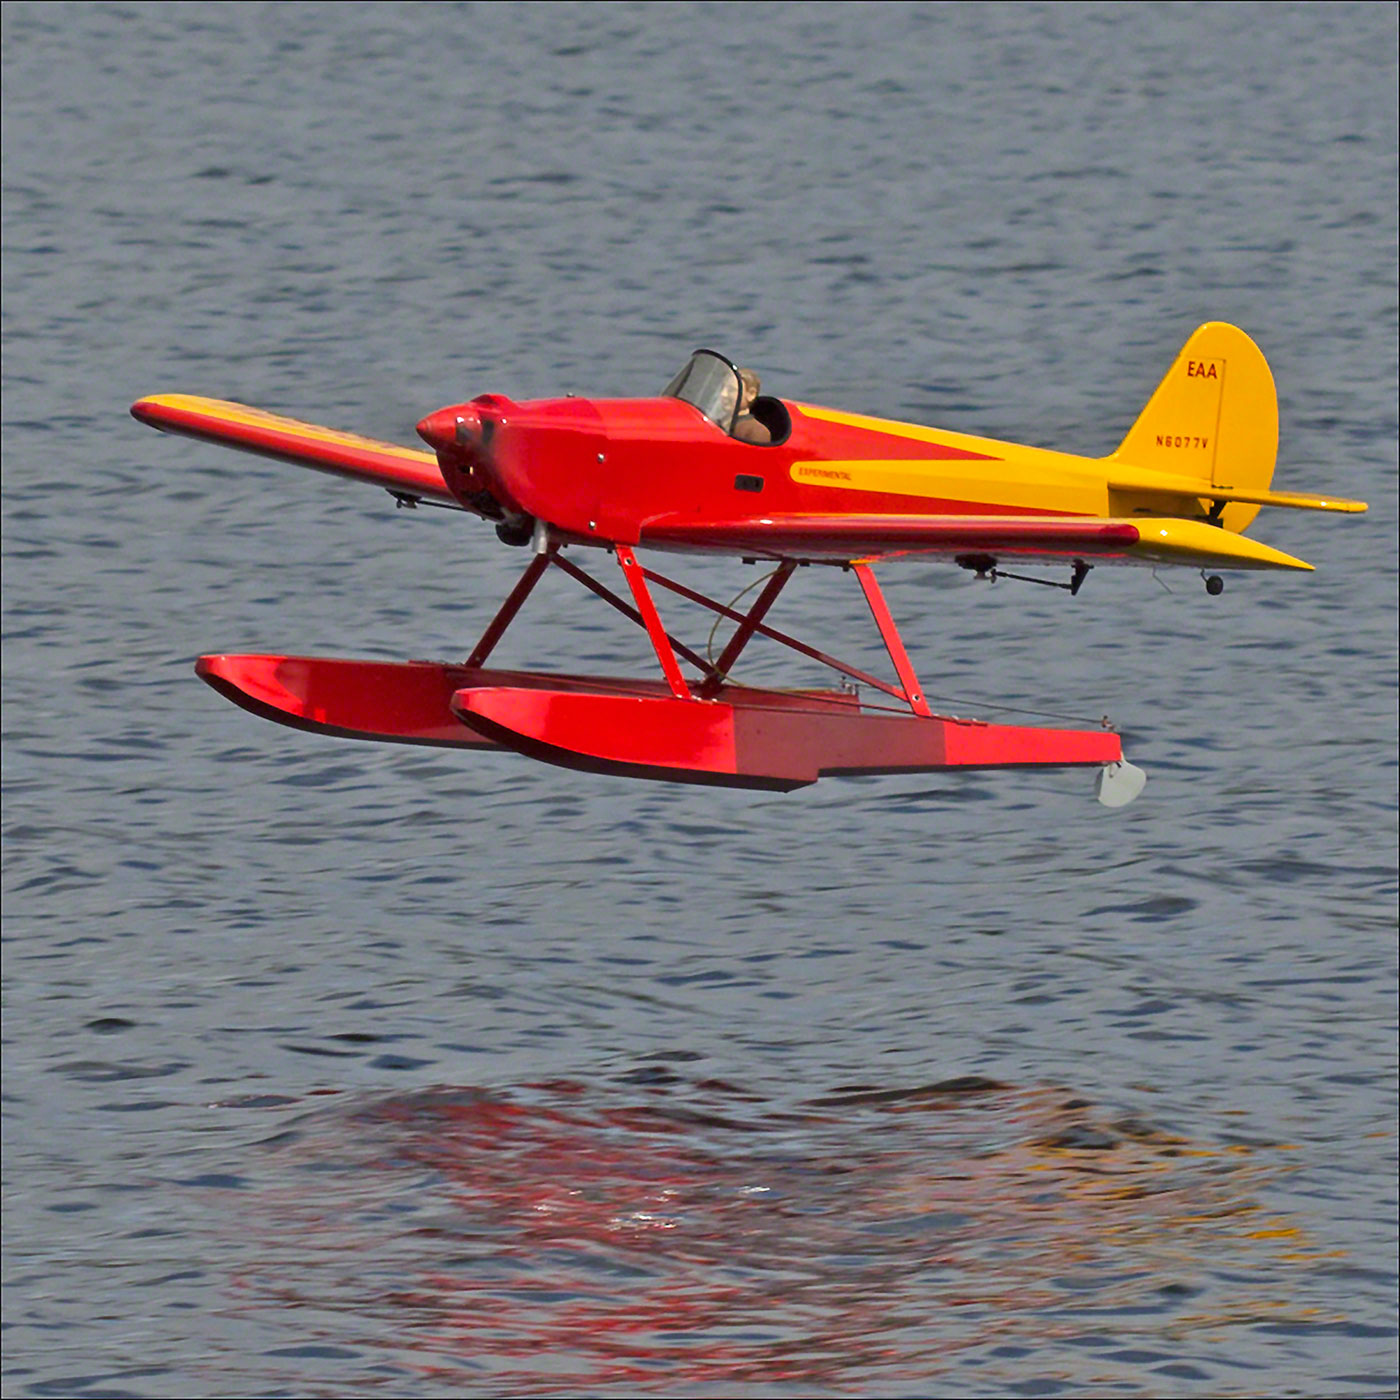
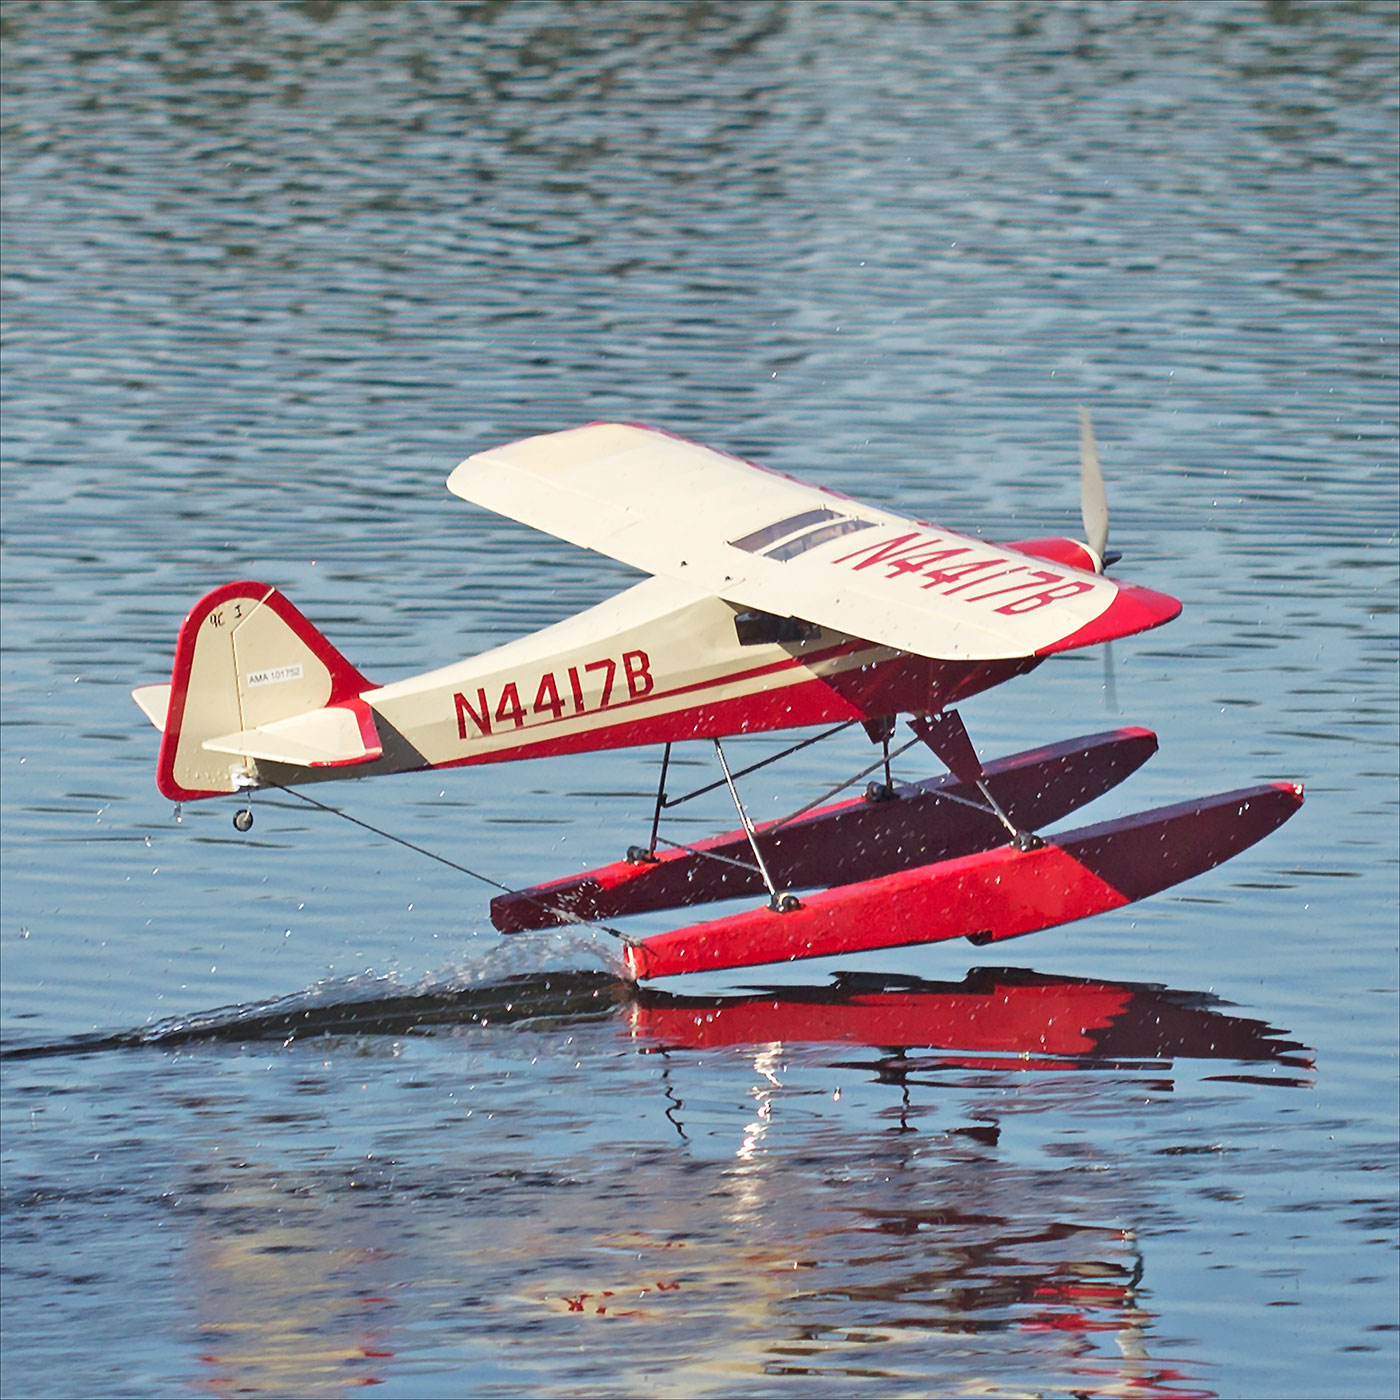
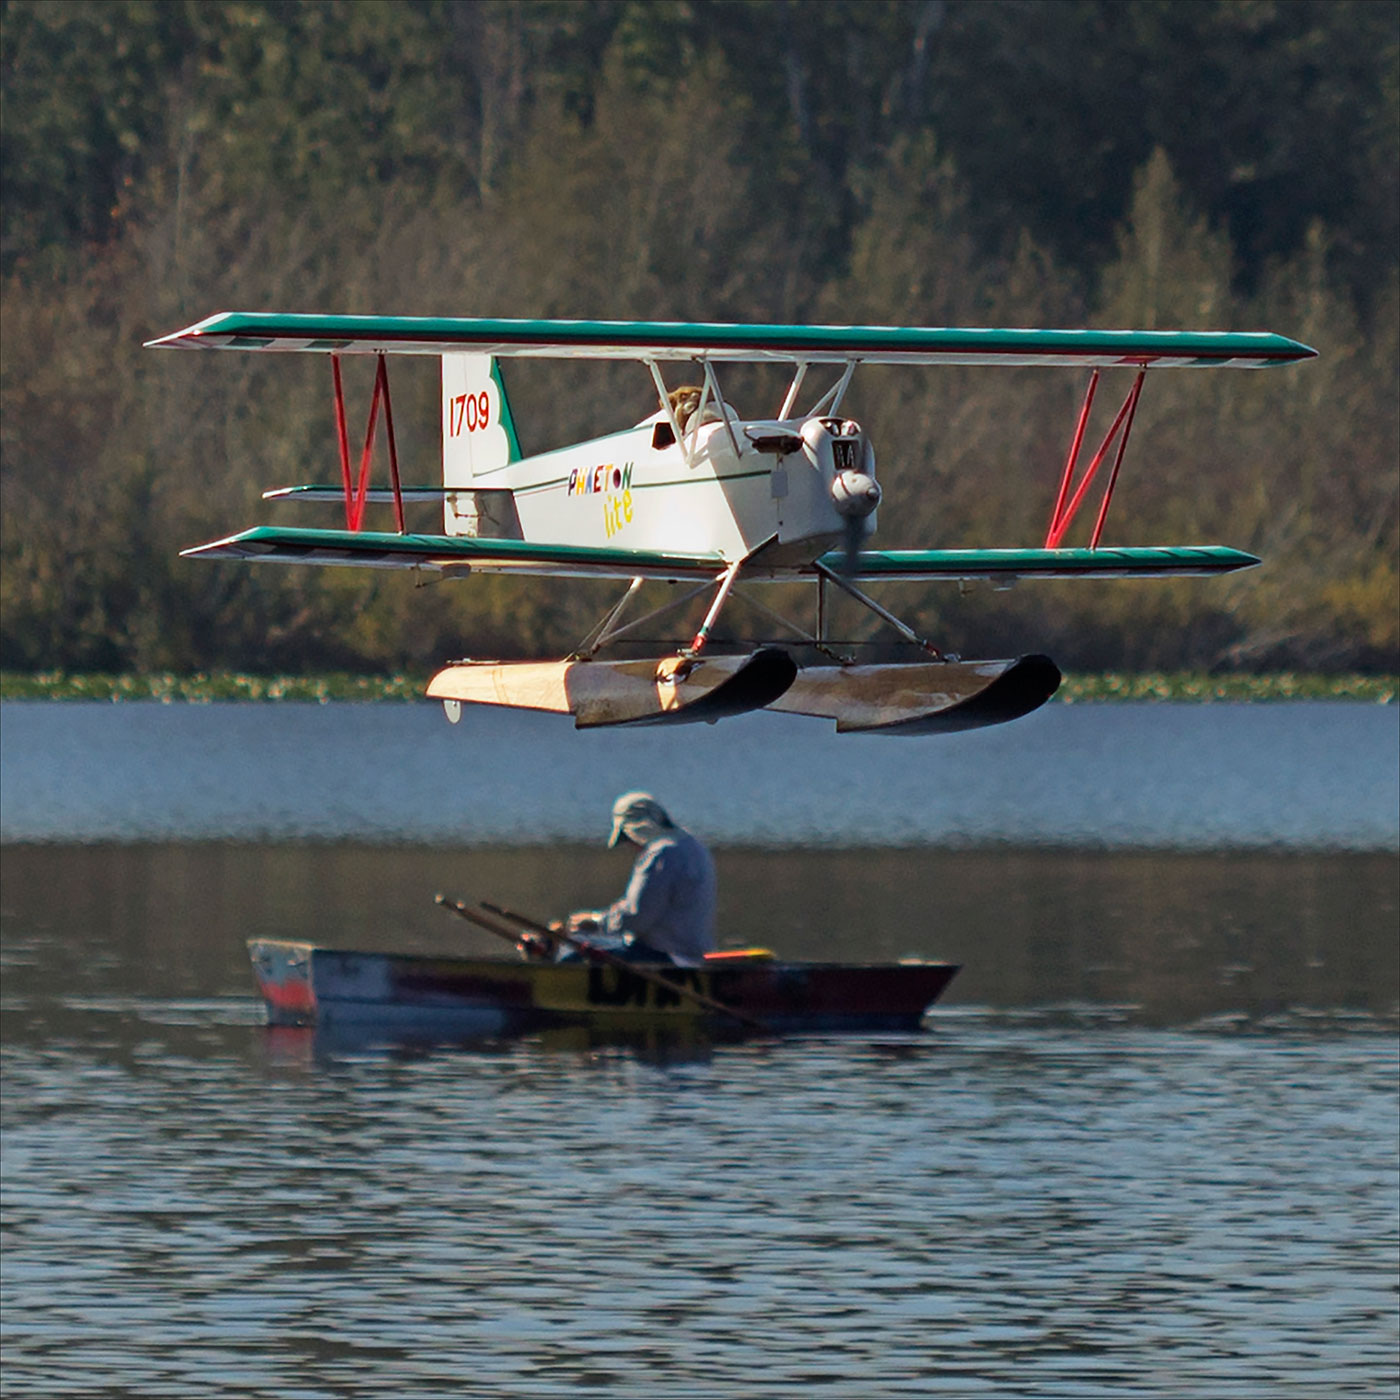
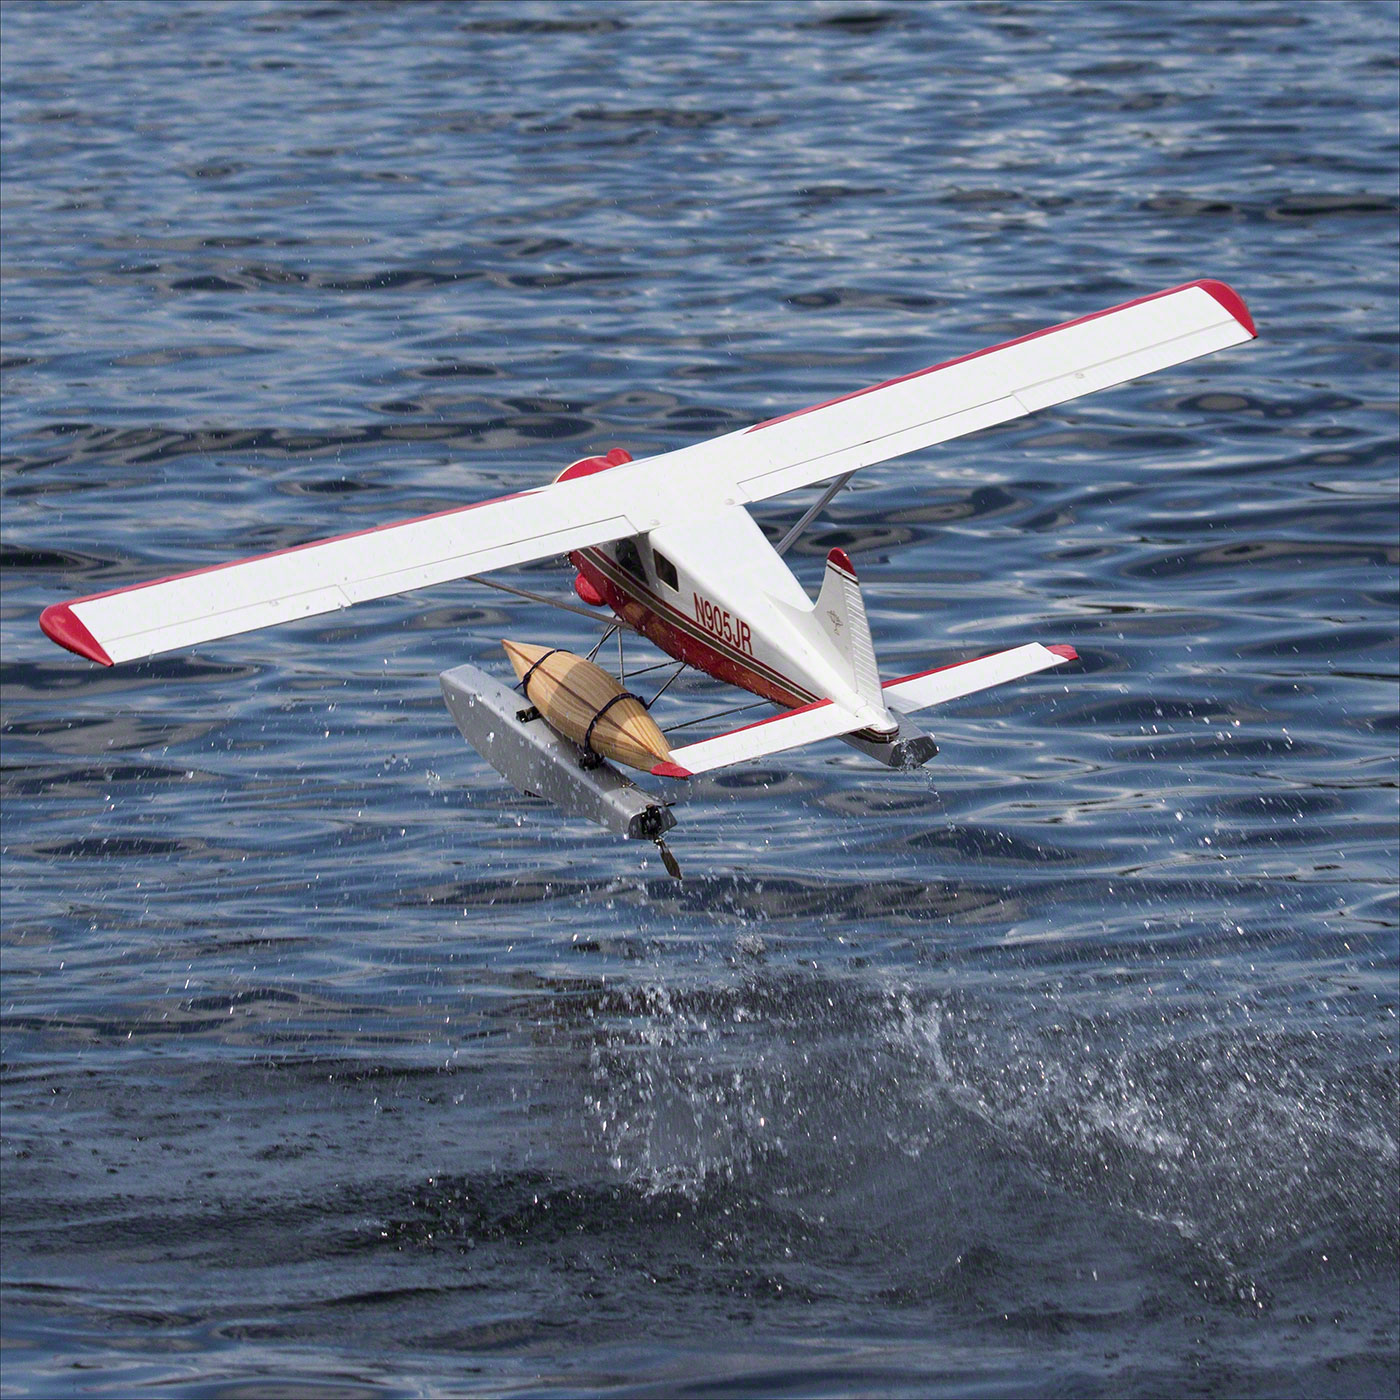
2015 is almost here and I decided to create a calendar for the new year. I selected thirteen float-fly images for the calendar (one for the cover and twelve for the months). The images were captured at joint Thurston County Miniature Aircraft Assn and Lake Nahwatzel RC Float Club events and were selected as representative of the aircraft flown at the lake. This article and gallery shows how the calendar was created.
Capturing the Images
For the float-fly images, I used my Canon Rebel T3i with a Canon EF100mm f/2.8 MACRO USM lens. The lens is affordable, high-quality, fixed focal length, has a wide aperture—and is very fast to focus. The lens has a focusing-distance-range-selection switch that decreases the actual autofocusing time. Since I do not use manual focusing, fast autofocusing is critical for capturing sharp images of the moving aircraft.
In order to obtain sharp images and to "stop the action," I set the camera to the shutter-priority mode (Tv) and set the shutter speed to 1/800. Although I sometimes use a faster shutter speed, I have found 1/800 will often show some propeller motion while still capturing details in the water spray. With this setup, and on a sunny day, the camera typically uses a low ISO setting for the exposure solution. Other camera options I select are the center-weighted-average metering mode and the Adobe RGB color space.
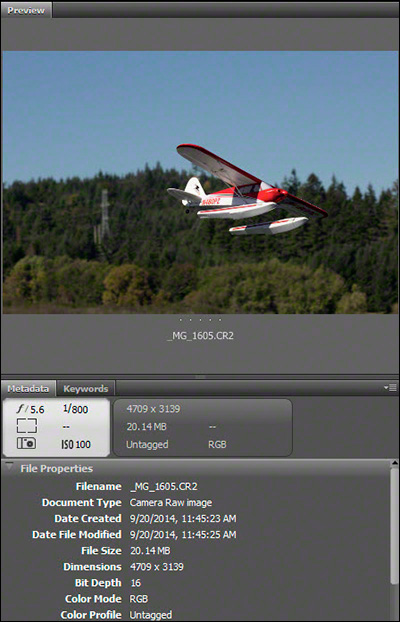
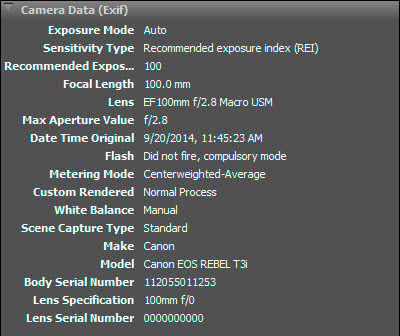
I capture my images in the camera-raw format. I prefer to use the raw image data, without in-camera processing, and then do out-of-camera processing with Adobe Bridge (Adobe Camera Raw editing is built into Bridge) and Photoshop. An important advantage of shooting camera raw is that the original digital "negative" is never altered during processing: the image can be reprocessed from scratch at a later date as my skills improve. The images below show the raw image camera data:
Camera Data
My favorite images are those with the RC aircraft in sharp focus, filling most of the frame, and with a blurred background. The blurred background shows the environment. Images like these have an almost 3-dimensional quality. Because the 100mm lens is a "fast" lens, the camera typically selects a wide aperture setting. This results in a shallow depth of field: the aircraft is in sharp focus and the background is blurred—just what I want.
Image Processing
When I photograph an event, such as a float-fly, I capture many more images than I end up using. As I gain experience, more of the images end up being keepers right out of the camera. However, most of the raw images need some out-of-camera processing before they are displayed or printed. A little out-of-camera processing can also turn a throwaway image into a keeper. The processing I apply to each image can consist of some or all of the following:
- Correct a crooked horizon,
- Improve shadow detail,
- Sharpen,
- Reduce noise,
- Crop and Size,
- A final tweak with curves,
- Save for the Web (low resolution), and/or
- Save for print (high resolution).
My Workflow
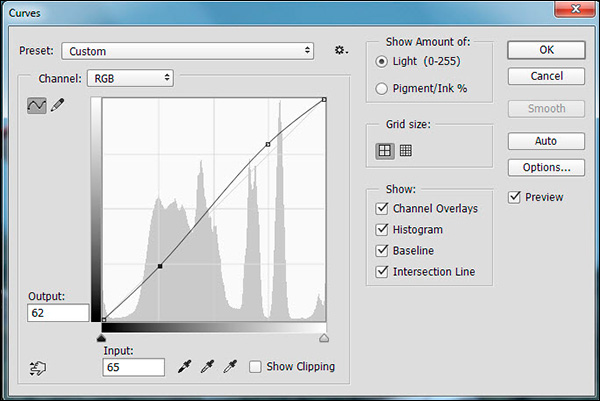
Typically, I open and preview new images in Adobe Bridge. I use the built-in Adobe Camera RAW editor to evaluate, full-sized, images I might want to use. While in Adobe Camera RAW, I correct for crooked horizon lines and sometimes make an exposure adjustment or image crop. I then open the image with Photoshop for further processing. With newer versions of Bridge, extensive processing can be done without ever opening Photoshop (see the "References" section at the end of the article). Still, out of habit, I do most of the image processing in Photoshop. Photoshop has a neat adjustment tool to improve the shadow details, the "Shadows/Highlights" tool. Normally, only a small "Shadows" adjustment is applied to the image in order to enhance the shadow details. I then apply a small amount of sharpening and/or noise reduction, if needed. I crop and size the image as required for web display or for a print. As a final tweak, with the "Curves" adjustment, I adjust the highlights upwards and the shadows downwards so that the curves line becomes an S-shaped curve. This tends to make the images "pop." As a rule, the image adjustments I use are small. If a large adjustment is necessary, I probably would not use the image. For example, I do not try to save an out-of-focus image.
Curves: the Final Tweak
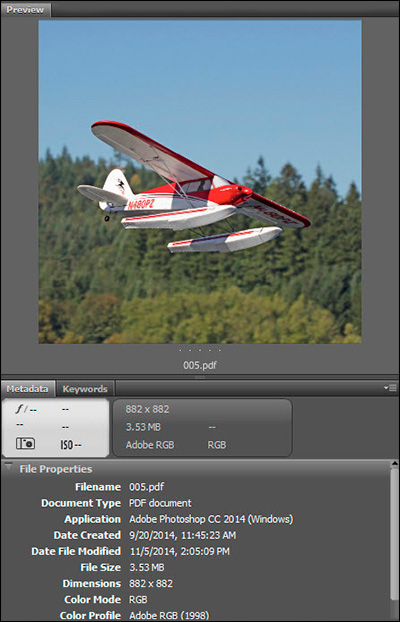
Finally, I save low resolution images for web display or high resolution images for printing. The image below shows the ready-to-print file information:
Processed and Ready to Print
Working with the Printer
I wanted to produce a calendar consisting of 12" x 12" images. Although many well-known printing services can print smaller-sized calendars, they do not always support the larger 12" x 12" size. My first attempt to get a calendar produced was through Walmart. After placing my order online, I received the calendar after a two-week wait. Not only was the calendar expensive, its quality was so poor I immediately returned it for a refund. I discussed the quality problem with the folks who operate the local on-site printing service. I found that Walmart does not do the printing of the larger calendar themselves but farm the printing out to a third party—apparently without oversight or quality control. I made my next printer choice after doing some careful research on the Web. I discovered Color Pro's home page and called them on their toll-free number.
My original contact with Color Pro convinced me that I had made the right choice. I explained what I wanted and was connected with a printing professional at once. Unlike my Walmart experience, I found I was talking with the actual printer: Color Pro does their printing in-house and exercises careful quality control. I talked with the representative and we discussed both my goals and her recommendations. We decided that my calendar would be wire-bound, have a sturdy front cover, and have images printed edge-to-edge on glare-free paper. Later, I also had text for the calendar's title and the photographer's credit printed on the back of the last calendar page.
After uploading my images, the representative verified that they had all arrived OK. I uploaded the high-resolution images sized to 12.25" x 12.25" for edge-to-edge printing and saved as PDF files, as recommended by the printer. There was no problem uploading the large files. Once the files were uploaded, I placed my order, requesting a proof before printing the calendars. Within a week, I received a high-quality calendar poof which matched my expectations in every way. I also received pricing information for the calendars.
After reviewing the pricing schedule for the calendars, I decided to order twenty. After including all costs, I found I could sell my calendars at an affordable price. This was one of my main goals, to make the calendars affordable for my float-fly friends. Even after including shipping costs, I found I could make the calendars available to my friends for just $15. I authorized the printing and, about a week later, was able to begin distributing them to those who had already ordered.
Gallery
The gallery of the calendar images below are best viewed on a large monitor. The default image size for this gallery is 1136 pixels—although you can view scaled-down images on smaller monitors, phones, and tablets. On my monitor, the images display at their full size of 12" x 12".
I hope you enjoy these images as much as I enjoyed taking them.